Select a screenshot to enlarge it.
Your first pattern
Create a repeating phrase on a Tone track. Connect an instrument, place a few notes and hear them play back.
Connect an instrument
Prism has 16 tracks, with matching MIDI channels: Track 1 uses Channel 1, Track 2 uses Channel 2, and so on. For this example, route Track 1 to an instrument receiving Channel 1.
In an AUv3 host
- Add Prism as an AUv3 MIDI processor and add a receiving instrument.
- Connect Prism to the instrument using the host's MIDI routing. Filter the destination to Channel 1.
- Connect the instrument's audio output to your speakers or headphones.
In AUM, put Prism on a MIDI channel and the instrument on an Audio channel, then connect them in AUM's MIDI Routing matrix.
In the standalone app
Open MIDI routing at the top right. Expand Prism in the right-side source list, then connect its Channel 1 row to your instrument destination across the top. Set that instrument to receive Channel 1.
Start a Tone pattern
A new project opens on Track 1 with a choice of Tone Track or Drum Track. Choose Tone Track for pitched notes and chords.
To set up another track, tap the notification strip to open Track Select, choose an empty track, then press Seq to reach its Tone/Drum chooser.
Build a phrase
The keypad chooses notes; the step sequencer places them in time. Open the Notes keypad tab if another tool is showing.
- Tap a note on the keypad.
- Tap sequencer steps 1, 5, 9 and 13 to place trigs.
- Select another note and place a few more trigs.
Each trig stores the notes selected when you placed it.
Play and edit
Start the host's transport if using AUv3, then press Play in Prism. Tap a filled sequencer step to remove its trig or an empty step to add one. Hold a trig for Trig Focus to edit its stored notes. Press Stop when finished.
If you hear nothing, check the host transport, Channel 1 routing, the instrument's MIDI input and its audio output.
Save for later
Open the top-left Menu → Projects → Save Project. Enter a session name, choose a folder and tap SAVE SESSION.
In AUv3, also save the host session to retain its instrument and routing setup. The standalone folder shortcut also offers Save.
Next: Interface and Control Buttons · Sequences and trigs · Tone tracks
Interface and Control Buttons
Prism's workspace has four main areas: Control Bar, GUI, Keypad and Sequencer. The current state—such as Sequencer or FX—determines which tools they show.
The main interface
| Area | Purpose | |
|---|---|---|
| 1 | Control Bar | Transport and shared actions. |
| 2 | GUI | Displays the current state (Seq, FX, CC, Song, etc.). |
| 3 | Keypad | Notes, pads and contextual controls. |
| 4 | Sequencer | Place and edit trigs; page and sequence controls below. |
| 5 | Top Bar (large screens) | Tracks, Patterns, Sounds, Scenes, mute profiles and piano roll. |
Keypad tabs
The four keypad tabs switch between note entry and editing tools. They are listed here from top to bottom; Notes is at the bottom.
| Tab | Purpose |
|---|---|
| Pattern / Scene | Patterns, Scenes and performance controls. |
| Transformation | Shift, quantize and transform trigs. |
| State-specific | Controls for the active state, such as Seq, CC or FX. |
| Notes | Play and select Tone notes or Drum pads. |
Tap a tab to open it; tap it repeatedly to cycle its layers.
Screen layouts
Prism adapts the same controls to different screen sizes and orientations.
| Layout | What changes |
|---|---|
| Landscape | GUI/Sequencer and Keypad sit side by side. |
| Portrait | The same areas stack vertically; their order can be changed in Preferences. |
| Large screen / Top Bar | Adds track and object selectors and piano-roll access above the editor. |
| Sequencer-only strip | Compact trig grid in a short AUv3 host window; tap the track-name/piano control for a larger view. |
| 64 Trig Mode | Shows a larger trig grid. Use the header grid button on Mac or the Shift shortcut on supported larger layouts. |
Tap, hold, double-tap and drag
These gestures work across most Prism controls.
| Gesture | Usual action |
|---|---|
| Tap | Select a control or perform its visible action. |
| Hold | Access a secondary action or temporary view. A small corner mark on the left side indicates a hold action. |
| Double-tap | Usually clear or reset the targeted value or object. |
| Drag | Adjust a slider or graphical parameter control. |
Colors indicate scope: Global controls use Prism's global color, track controls use the track's color, and Drum pad controls use the pad's color.
The highlighted control shows the current selection or active option. For control-specific help, use Menu → Help & Support → Help Mode.
Menu and notifications
Use the top-left controls for projects, settings and track navigation.
The Prism-shaped Menu icon is at the top left. It opens Projects, Preferences and Help & Support. Tap the notification strip next to it to open Track Select. Choose a track and press Seq for its sequencer home.
Play, Stop and Follow
Playback controls stay available while you move between editing states.
- Play starts playback. In AUv3, start the host transport first; N/A: Play Host means Prism is waiting for it.
- Stop ends playback and recording and releases held notes. Hold Stop for Panic.
- Pause, where available, holds the playback position. Standalone uses Play-to-restart instead.
- Follow in Seq Setup keeps the visible sequence page aligned with playback. Moving pages manually pauses Follow; hold Play during playback to resume it.
In AUv3, tempo comes from the host. Standalone has its own BPM control.
Shift
Shift exposes secondary actions, including quick mutes and trig selection.
Hold Shift to show secondary controls temporarily, or tap Shift to toggle them on and off. With Shift on, you can mute or unmute:
| Target | Action |
|---|---|
| Track Select trig or Top Bar track button | Mute/unmute the track. |
| Sequence trig | Mute/unmute that trig. |
| Drum pad | Mute/unmute the pad. |
| Tone lane | Reveal the lanes; tap the active lane to toggle its mute. |
Using Shift to select trigs
Press Shift to show Sel. Trigs below the sequencer. Use its controls to select trigs for group editing.
Sel. Trigs choices
| Control | Selects |
|---|---|
| All | All trigs in the active sequence; press again to clear selection. |
| Page | Trigs on the visible page. |
| O:E | Alternating odd/even grid positions; excludes off-grid trigs. |
| X/Y | Every Xth stored trig using the chosen fraction: 1/2, 2/2, 1/3, 3/3, 1/4 or 4/4. |
Selections open Trig Focus for group edits.
Mute, mix and groove controls
Open Track Select to adjust the selected track, Tone lane or Drum pad. Mute toggles that part without deleting its trigs; Solo isolates it. Hold Solo to clear track solos (Solo Off For All).
Mixer shows track velocity offsets in the sequencer area and lane/pad offsets on the keypad; Delay offsets sequence timing. Hold Swing for groove templates or Human for Velocity, Length and Timing variation.
Groove offsets
Human weights are 0–100%. Local lane/pad Swing and Human offsets run −100 to +100% with 0 neutral. Local / Linked controls whether the selected context follows inherited settings.
Hold Mute to open MUTE OPTIONS, including Thru / PLocks, Thru / Melt, Mute / Melt and All Lanes / All Pads. Hold Mute again, or tap Mute while the options are open, to close them.
Mute Options
| Control | Result |
|---|---|
| Thru / PLocks | Allow parameter locks through the applicable mute; track and sequence mute settings both matter. |
| Thru / Melt | Allow the external/Melt path through a mute where its other routing levels also permit it. |
| Mute / Melt (Tone) | Block incoming Drum Melt notes. |
| Mute / Melt (Drum) | Block outgoing Drum Melt notes. |
| All Lanes / All Pads | Mute or unmute the selected track's lanes/pads together. |
Follow the displayed Mute/Melt labels on Drum rather than assuming a fixed button position.
Copy and Paste
Copy and Paste work with the object currently under the gesture.
Hold Copy and tap the source, then hold Paste and tap the destination. Pasting a Drum pad or Tone lane replaces the destination's sequence.
You can copy: Trigs, Tone lanes, Drum pads, Arp patterns and steps, LFO settings, Scenes and automation lanes.
Capture
Capture provides shortcuts for storing the current editing state.
Hold Capture to reveal shortcuts for capturing the current state without opening its usual editor.
- Capture + Seq: capture the current Pattern, then continue editing a copy.
- Capture + Song: capture the current device state as a Song step.
Sequences and trigs
Every Tone lane and Drum pad has its own sequence. Select a lane or pad, then press Seq to open its sequencer steps.
Place trigs
Tap an empty step to place a trig, or a filled step to remove it. Tone trigs use the active keypad notes; Drum trigs use the selected pad.
To change an existing trig, hold its step to open Trig Focus. See Trig Focus and Step FX for editing stored notes and selecting multiple trigs.
Note input settings
Set these values before placing trigs. Each new trig uses the current input settings.
| Control | What it sets |
|---|---|
| Velocity | How strongly the notes play. |
| Length | How long the notes play. |
| Chance | The probability a trig plays when eligible. |
| Every | A repeating cycle that chooses which sequence loops the trig can play on. |
Drag the input-note graphic vertically for Velocity or horizontally for Length. On Tone, tap an input note to edit it individually; tap again to edit all notes, or double-tap to remove it.
Every makes a trig conditional. For example, enable 1 of 2 visits to play on alternating loops. Hold Every to open its keypad: hold a position to set the cycle length, then tap positions to choose which visits play. Chance still applies to those visits.
More conditional options
- Every cycles: Up to 16 positions. Tapping beyond the cycle extends it.
- Tone lanes: Have separate Chance/Every conditions for the whole lane. Lane Chance choices are 12, 25, 37, 50, 62, 75, 87 and 100%.
- Once: Only on the first sequence loop.
- <: If the preceding trig played.
- <<: If the last trig with conditional settings played.
- !: If the preceding trig did not play.
To change these settings on a stored trig, use Trig Focus.
Set sequence length and resolution
Press Seq Setup below the sequencer to set how long the sequence runs and how its steps are spaced.
| Control | What it sets |
|---|---|
| Bars | Length in bars, with an additional-step remainder for uneven lengths. |
| Steps | Length as a number of steps at the current resolution. |
| Res. | Step spacing (such as 1/16 or 1/8), without moving stored trigs. |
| 1 Page | Adjusts resolution to show the entire sequence on one page. |
Sequences can be up to 16 bars. For longer sequences, use the page controls below the trigs to view other steps.
Page shortcuts
| Page control | Action |
|---|---|
| Existing page | Show that page. |
| Page already in view | Choose 1/32, 1/16, 1/8, 1/4 or 1 Page. |
| Unused page | Set the length there, Clone the phrase to it, or Stretch the phrase to fit. Hold for Set. |
| First page with one page shown | Set 1, 2, 3, 4, 8 or 16 Bars, fitted to one page. |
Sequence setup options
| Control | Action |
|---|---|
| Legato | Hold each trig until the next trig. |
| Cutoff | Stop previous notes when the next trig plays. |
| Triplets | Three active steps in each four-step group; resets input Length to one step. |
| Pad (Drum) | Link/unlink the pad's sequence timing; hold to toggle all pads relative to the active pad. |
| Drone (Tone) | Sustain until Stop. On sets sequence length to 1/16; off sets it to one bar. |
A shorter length retains trigs beyond its endpoint. Coarser resolution can hide off-grid trigs, marked by a corner triangle; use a finer grid to see them.
Hold Seq Setup for the temporary length keypad. Follow keeps the displayed page with playback. Auto-adjust Step Resolution in Preferences can keep a resized sequence on one page.
Quantizing and Shifting Trigs
Open the transformation keypad tab to shift trigs or quantize their timing.
| Control | Action |
|---|---|
| Left / Right | Shift trigs earlier or later. |
| Up / Down (Tone) | Shift pitches. |
| Quantize | Open the Quantize editor. |
Quantize stored trigs
Open Quantize on the transformation keypad. You can also hold Seq Setup for its Quantize shortcut.
- Set Quant To for the timing grid and Amount for how strongly trigs move toward it.
- If needed, adjust the range with the piano-roll handles.
- Press Quantize to apply.
Quantize options
- Amount: 0% leaves timing unchanged; 100% moves trigs to the nearest chosen grid point.
- Range: Drag an end to resize, or the middle to move it; double-tap to reset to the full sequence.
- Drum: Choose Pad or Track for the affected sequence(s).
- Tone Trim: With a partial range selected, Trim removes trigs outside it.
- Overlapping events: Trigs moved to the same pulse merge into one block.
Sequence shortcuts
| Shortcut | Action |
|---|---|
| Shift → Trash | Clear the active sequence. |
| Shift + trig | Mute or unmute a trig. |
| Shift → Sel. Trigs | Select a group of trigs. |
| Copy / Paste | Hold Copy and tap a source lane/pad; hold Paste and tap the destination. |
| Capture + Seq | Capture the current Pattern and continue editing a copy. |
Trig sliders: Press Shift + Seq Setup or double-tap Seq Setup. Choose an input value or mapped CC parameter to adjust values stored on existing trigs. See CC profiles and P-Locks for detailed editing.
Tone tracks
Tone tracks play pitched notes and chords using the Song scale. Each Tone track has four independent sequence lanes for layering different phrases.
Song key and scale
Song Key and Mode set the scale used by Tone keypads and scale-aware transformations. Open the main FX selector, then drag Song Key or Mode to change them. The settings apply to all Tone tracks.
Hold Song Key to open Key & Scale Engine. Choose a scale category on the left and a scale on the right; its notes appear in the keyboard preview. Press FX to return.
Custom scales and advanced choices
- Scale families: Diatonic Modes, Minor Variants, Melodic Minor Modes, Pentatonic & Blues, Symmetric, Exotic / World and Bebop.
- Chromatic: Choose Symmetric → Chromatic for all 12 pitches.
- Custom pitches: With a custom scale selected, hold Song Key and use the pitch-class trigs to add or remove notes (at least one must remain).
- Advanced controls: Hold Shift for Adv Key Config. Root-selection trigs set the root in ordinary modes; custom pitch trigs change the pitch collection in custom mode.
Tone note shifts follow scale steps, which aren't necessarily chromatic semitones. Imported Tone MIDI also follows the selected scale; the import browser lets you correct the detected source key before re-importing. See MIDI Import.
Tone keypad
The Tone keypad plays notes and selects pitches for new trigs. Bright pads show selected input notes; dim root markers help identify the scale.
Use the right octave control to change register. The central arrows move input notes by a scale step; hold an arrow to move an octave.
Latch (∞) holds notes after release; tap a latched note again to release it. Shift + Latch toggles keypad playback mute for silent note selection.
Live note input
- Turning Latch off releases notes not physically held; notes still pressed release when you let go.
- Keypad Touch Velocity in Preferences uses touch height to set input velocity (higher is louder).
- Input Velocity also has a field, right-side control and note graphic. None of these rewrites stored trigs.
Input-note editing
The input-note display shows the notes that will be used for the next trig. By default, edits affect all input notes.
Tap one note cell to edit that note alone; tap it again to return to all notes. Double-tap a cell to remove it. Drag the input-note graphic horizontally for Length or vertically for Velocity; the pitch arrows move the selected note.
To change notes already in a trig, use Trig Focus.
Simple input chords
Three Chord slots build chords from any root on the Tone keypad. Each slot remembers its own richness and voicing, so you can switch between chord shapes while playing or entering trigs.
Select Chord 1, Chord 2 or Chord 3 on the Notes keypad, then play a root. The richness strip offers Root, Fifth, Triad, Seventh, Ninth and Eleventh. Hold the selected slot to edit its voicing.
Chord voicing controls
| Control | Effect |
|---|---|
| Sus | Replaces the third with the fourth scale degree. |
| Open | Widens a voicing by moving the next-to-top voice down an octave (with 3+ voices). |
| Walk | Automatically chooses inversions/octaves for smoother movement between chords. |
| Bass | Cycles Off → one octave below → two octaves below → Off. |
| ▲ / ▼ | Rotates inversions; disabled while Walk is on. |
Root produces one note; inversions need at least two. Turning Walk off restores base inversion. Voicing changes affect new input, not trigs already stored.
Tone lanes
A Tone track has four independent sequence lanes. Use them to layer melodies, bass parts or chords with different rhythms; each lane stores its own trigs and sequence settings.
Tap Multi Seq (the 2 × 2 control), then tap a lane to edit it. For quick access, hold Shift on the normal keypad: tap a lane to select it, or tap the active lane to toggle its mute.
Hold Copy and tap a source lane; hold Paste and tap a destination lane to replace its stored phrase and settings.
Lane playback settings
- Chance / Every: Control whether a whole lane plays on a loop, independently of individual trig conditions. Chance choices are 12, 25, 37, 50, 62, 75, 87, 100%. In Every, hold a position to set cycle length and tap positions to select eligible loops.
- Chokes / Choked: A playing Chokes lane cuts off Choked lanes and suppresses their trigs on that pulse. Each lane can have one role: Off, Chokes or Choked; tap its active role again to clear it.
- Arp: All four lanes share one Arp; each lane can enable or mute its own Arp participation.
- All Lanes: Hold to clear trigs and reset all four lanes.
Tone piano roll
The piano roll shows stored notes by pitch and time. Open Seq to view the sequence's piano roll; on large layouts, the Top Bar also provides piano-roll access. Tap the roll to move to its corresponding sequence page.
Hold a roll trig to enter Trig Focus. In focus, tap notes to select them; Shift-tap adds to the selection. Tap empty time to release focus.
Piano-roll editing
| Gesture | Action |
|---|---|
| One-finger drag on selected trigs | Horizontal changes time; vertical changes pitch. |
| One-finger drag away from selection | Selects a range of trigs by time. |
| Two-finger drag horizontally | Changes note length. |
| Two-finger drag vertically | Changes velocity. |
Outside focus, two-finger horizontal editing changes note lengths on the current page; vertical editing changes pitch. In focus, double-tap at the same horizontal position to release focus. Outside focus, double-tap resets the loop range. A finer grid or the piano roll reveals off-grid trigs.
Tone Lab
Tone Lab is the active lane's quick-edit panel for velocity, groove and length. Open it with the flask; use Vel Shift, Swing, Hmnz and Trig Steps, then tap the right arrow to return.
For generating or transforming stored rhythms, use Trig Tools.
Chord Blocks
Store a chord once and reuse it in trigs across tracks and patterns. Editing that block updates every trig that refers to it; each trig keeps its own timing and velocity.
Sharing and banks
Sharing and banks
| Scope | Remember |
|---|---|
| 4 banks · A–D | 8 blocks/bank · 8 notes/block |
| Project-wide | Scene recalls the bank. Each trig keeps its timing/velocity. |
Blocks are shared across tracks and patterns in the project. Editing one slot changes every trig using it. For a variation that should stay separate, copy the block to another slot first.
Each bank gives those eight slots another set of notes. Scenes recall the active bank, so the same slot number can provide different harmony in another Scene.
Open → edit → use
On a Tone track, open the music-note tab and reveal Chord Blocks.
1. Open
On the music-note tab, tap the two-square toggle and select Chord. Hold the cube to open the editor.
2. Edit
Choose Bank A–D, then hold a block and tap the right-hand note pads to change its notes.
Notes and empty blocks
Note pads follow the current scale and octave. Editing notes changes every trig using this block. An empty pattern can still have populated blocks. Selecting + may copy the current input notes into that slot. To start empty, select a slot you can change and tap trash.
Block tools
Block tools edit one shared chord slot; they do not copy or remove the trigs that reference it. To clear a block, select it and tap trash at the focused strip's right end.
A copied block is independent. Existing trigs keep their current references. Clearing or pasting changes a shared slot's contents; its trigs remain in the sequence.
Copy and note movement
Copy and note movement
- Copy/Paste uses the block pads on the Chord Blocks keypad. Release Copy before holding Paste; pasting replaces the destination's notes.
- Copying a block copies its notes, not its rhythmic uses in the sequence. Choose the copy as input to place new uses.
- ▲ / ▼ moves notes in scale steps. Select a note in the focused strip to move that note; with none selected, the whole block moves.
Details
More gestures
- Remove a sequence trig: tap its filled step. The shared block stays.
- Lower companion trig: double-tap to clear a nonempty block; an empty block is randomized instead. In the randomization panel, it randomizes the corresponding block.
- Return to ordinary notes: choose an ordinary note/chord input mode on the keypad.
Bank tools
Bank tools transform several blocks at once. Protected blocks can be excluded from the transformations. Tap dice left of the focused strip to reveal Randomize, Invert and Smooth; tap the return arrow to close.
Tap a block's padlock above its piano display in this panel to protect it from these transformations.
Bank transformations
These commands affect the active bank, so tracks and patterns using its blocks can change together. Lock the blocks you want to retain before applying a transformation.
Transformation details
Transformation details
| Command | Musical result |
|---|---|
| Randomize | Generates note collections for eligible blocks, including empty slots. |
| Invert | Reworks intervals and voicing within existing chords. |
| Smooth | Looks for voicings with smoother note movement between blocks. |
Block locks constrain these transformations. Clearing and Trigs to Blocks can still replace locked content.
Trigs to Blocks
Trigs to Blocks replaces matching stored chords with references to shared blocks; it changes the selected bank’s first slots. From the normal Tone sequence with Chord Blocks keypad active, hold Capture → press Trigs to Blocks → release both.
Prism confirms the conversion with [Converted Seq > Blocks].
Conversion rules
Conversion turns the active sequence's stored notes into block references. Repeated matching chords share a slot, while their sequence positions stay in place.
| Remember | Conversion does this |
|---|---|
| Whole sequence | Overwrites the selected bank's first slots; other uses of those slots change too. |
| Up to 8 chords | Extra distinct chords remain unconverted. |
| Note detail | Uses the first note's length/velocity; separate per-note settings are lost. |
Conversion details
Matching and overflow
- Slots: creation begins at block 1 in the selected bank. Only created slots are replaced; unused slots keep their contents.
- Matching: note count and order must match. Different note lengths or velocities do not create separate blocks.
- Overflow: a ninth distinct chord stays as notes; a later repeat of one of the first eight can still become a reference.
- Note detail: the first note supplies the reference's length and velocity. Separate settings for each chord note are not retained. This converts stored sequence notes; downstream FX are not rendered into blocks.
Drum tracks
Each Drum pad has its own sequencer, so kicks, snares and percussion can run different rhythms or lengths. Link their timing for a shared groove, or let independent pad lengths create polyrhythms.
Drum track setup
Choose Drum Track on an empty track to open Edit Drum Profile. Here you assign the notes your drum instrument expects.
Drum profile and MIDI output
Load an existing profile, or select a pad and set its name and MIDI Output under Edit Pad. Selecting a pad or changing MIDI Output auditions that note. Press Done to use the mapping on this track.
You can reopen the profile editor with Shift + wrench.
Pad Type
Pad Type identifies the pad's General MIDI (GM) drum type, such as Kick (36) or Snare (38). Prism uses it to match drum parts during MIDI import and generation. Choose a type from Edit Drum Profile → Pad Type, or select No Type. The pad's actual outgoing note is set separately by MIDI Output.
Saving and managing Drum profiles
- Save: Updates the selected user profile. If the mapping is new, it creates a profile like As.
- As: Saves a named copy; duplicate names receive a number. Editing a factory profile saves a user copy.
- Star / cube: Favorite a profile / show or hide factory profiles. Favorite profiles are available as quick choices from the sequencer.
- Blank top entry: Returns to an unnamed mapping.
- Hold Del: Permanently deletes the selected library profile without confirmation.
Profile files can be backed up separately from projects and imported MIDI. See Files and saving.
Drum pad sequences
Tap a Drum pad to play it and select its sequencer. Tap empty sequencer steps to place trigs, or filled steps to remove them. Each pad retains its own trigs, input values and output mapping.
Multiple notes in one Drum sequence
Tap the Notes keypad tab again to open its second layer. Like Tone note input, this layer lets you select several MIDI notes for one trig—including notes associated with other pads or other MIDI note values. Those notes play from the selected pad's sequencer; switching input notes does not switch the sequence you're editing.
Input, mute and copy
- Set Velocity, Length, Chance and Every before placing trigs. Hold a pad to sustain its input note.
- The input Velocity slider, field or graphic adjusts input strength; Keypad Touch Velocity in Preferences also responds to touch height.
- Holding the Notes tab opens Latch, keypad playback mute and touch-velocity settings. Latch holds notes until pressed again; playback mute selects pads silently.
- Shift + pad toggles its sequence mute. Copy + source pad, then Paste + destination pad, replaces the destination's sequence while keeping its own MIDI Output mapping.
- Hold a filled trig for Trig Focus, including Drum Velocity, Length, Ratchet/Roll and Flam Step FX.
Independent or shared timing
Drum pad sequences can have different lengths, creating evolving rhythms, or share one timeline so their beats stay aligned.
Open Seq Setup and tap Pad to link or unlink the selected pad. Linked pads share length, resolution, loop range, speed and page, while keeping their own trigs. Unlinked pads use independent timing. Hold Pad to apply the opposite of the selected pad’s link state to all pads.
Drum Lab
Drum Lab shapes individual pads and relationships between them. Open the flask, select a pad, then use its tools.
| Tool | What it does |
|---|---|
| Swap | Exchanges two pads' rhythms while keeping their MIDI output mappings. |
| Layer | Plays other pads' notes alongside the source pad's trigs. |
| S-Chain | Suppresses other pads' trigs when the source pad plays. |
| P. ## | Try another sequence for this pad, or save yours to an empty pattern and start fresh. |
Use Vel Shift, Swing, Hmnz and Trig Steps in the top row to adjust the active pad's velocity, timing and sequence length. Tap the right arrow to return.
Drum Lab gestures and resets
Swap
Choose Swap, then tap another pad. Their sequences and Euclidean timing settings are exchanged. Prism selects the second pad and shows Swapped Pads.
Layer
- Assign: Tap other pads to add or remove their notes. They can still play their own trigs.
- Velocity: Drag vertically to adjust the layer velocity offset.
- Reset: Tap the source pad to clear its layers (RESET PAD LAYERS).
S-Chain
- Assign: Tap other pads to turn suppression on or off.
- Reset: Tap the source pad to clear its assignments (RESET SIDECHAIN).
Circular assignments are rejected with Sidechain N/A.
P. ##
Your starting sequence is the selected pad's sequence when you open P. ##.
- Try: Tap a pattern to load its sequence for this pad.
- Save and start fresh: Double-tap another pattern where this pad is empty. Your starting sequence is saved there, leaving the active pad empty.
- Paste: Enable Paste, then tap a pattern to replace this pad's sequence there with your starting sequence.
- Revert: Restore your starting sequence. Copies saved to other patterns remain.
- Exit: Tap P. ## again.
Velocity and timing
- Vel Shift: Changes sequence playback velocity, not live input velocity.
- Trig Steps: Shared by linked pads. Groove offsets remain local to each pad.
- Speed and resolution: Set these separately in Seq Setup.
Trig Focus and Step FX
Trig Focus edits notes and settings already stored in a trig. You can edit one trig or select several to change together, including their Step FX and CC locks.
Enter and lock Trig Focus
Hold a filled sequencer step to focus its trig. Release to exit, or enable the focus lock to keep editing after releasing your finger. With focus locked, tap the focused trig or highlighted Seq control to exit.
Slide upward from a held trig to retain focus temporarily, without enabling the persistent focus lock.
Select multiple trigs
Focus more than one trig to change their stored settings together. Press additional trigs while holding the first, or hold another filled trig to select a range.
For larger groups, use Shift → Sel. Trigs:
| Control | Selection |
|---|---|
| All | Every stored trig; press again to clear the full selection. |
| Page | Trigs on the visible page. |
| O:E | Alternating odd or even grid positions; excludes off-grid trigs. |
| X/Y | Every Xth stored trig in a cycle, counting trigs rather than empty steps. |
X/Y cycles through 1/2, 2/2, 1/3, 3/3, 1/4, 4/4. A group selection focuses its first selected trig.
For a time-range selection, hold a trig in the piano roll and drag away from selected trigs to draw a horizontal selection range. Shift-tap adds a piano-roll trig; tapping one already selected toggles it.
Edit stored notes
The keypad tabs give you Notes, Transformations and Conditions for the focused trigs. In Notes, tap pads to add or remove notes; hold a pad to replace the notes with that pitch. Adjust Velocity, Length, Chance and Every for the selection.
Individual note values
Tap a note in the focused-note graphic to edit it separately; tap again to return to all notes. Double-tap a note to remove it. Drag horizontally for Length, vertically for Velocity, or use the pitch arrows to transpose it.
Move and resize trigs
Tap an empty sequencer step to set the focused trig's length to that step. Tap the last step of its note tail to set its length to one beat.
To drag instead, hold Shift for L/R Drag settings. Horizontal dragging can edit length or placement; when L/R Drag is set to Velocity, drag right to momentarily adjust placement.
Piano-roll gestures
In the piano roll, drag a selected trig horizontally to move it or vertically to change Tone pitch. With two fingers, drag horizontally for note length or vertically for velocity. Tap empty time to leave focus.
Nudge timing
Nudge makes small timing offsets, including positions between sequencer steps. While in Trig Focus, open the Nudge tab (replacing the normal Trig Tools entry) and drag its centered slider: left for earlier, right for later.
Step FX
Step FX add per-trig variations such as pitch progressions, repeated strikes and strums. A trig can hold multiple Step FX together; each effect has its own settings.
In Trig Focus, press Step FX. Each effect has its own graphic and parameter controls.
| Action | Control |
|---|---|
| Add | Choose an effect and touch its graphic. |
| Edit | Drag the graphic, or use the parameter row above it. |
| Stack | Add another effect to the same trig. |
| Remove | Double-tap the effect graphic or tab. |
| Copy / Paste | Transfer Step FX settings separately from the trig's notes. |
| Group edit | Select several trigs; adjust an effect to update the selected group. |
| Tone Step FX | Drum Step FX | What it changes |
|---|---|---|
| Velocity | Velocity | Played velocity over repeated visits. |
| Pitch | — | Pitch over repeated visits. |
| — | Length | Played note duration over repeated visits. |
| Ratchet / Roll | Ratchet / Roll | Repeated notes within a trig. |
| Strum | — | Timing and strength across chord notes. |
| — | Flam | Earlier strikes before the main hit. |
Step FX parameters
- Velocity: Interval, Steps, Curve, Randomize. Steps counts the starting value; Interval changes velocity between visits. Curve shapes the progression; Randomize adds variation. The trig's stored velocity is the starting value.
- Pitch (Tone): Interval, Steps, Curve, Randomize. Pitch intervals use scale degrees. The stored pitch is the starting value.
- Length (Drum): Interval, Steps, Randomize. Changes played duration across visits.
- Ratchet / Roll: Speed, Swing, Vel Curve, Humanize. Sets repeat spacing and velocity shape. Hold Speed to switch between synced and free rates.
- Strum (Tone): Time, Swing, Vel Curve, Humanize. Spreads chord notes; negative Time reverses their order. Hold Time for synced/free timing.
- Flam (Drum): Time, Vel Offset, Humanize. Adds strikes before the main note. Hold Time for synced/free timing.
Step FX snapshots
Save frequently used effects in three snapshot slots per Step FX type. Hold the Step FX tab to open the snapshot matrix, then select an effect column. Tap an empty slot to save the current settings, an occupied slot to recall them, or hold a slot to overwrite it.
Snapshot selection
The first tap on an empty slot in another effect column selects that effect. With the effect already selected, tap an empty slot to save it. Snapshots contain the selected effect's settings.
P-Locks
P-Locks store mapped CC values for individual trigs. Set up a CC profile, enter Trig Focus and press CC. Adjust a mapped parameter to create its lock; double-tap a locked parameter to remove it.
Use Smooth to transition gradually toward the locked value.
Lock overview and additional options
Tap the circled keyhole below the CC grid to see all locks on the focused trig. Use a row's X to remove one lock, or trash to clear locks in the current selection.
Jitter varies lock values, while Chance and Every determine when they apply. Other lock options, including Legato and Trigs Resets, are covered in CC profiles and P-Locks.
Recording and MIDI Capture
Record live notes, enter a phrase step by step, or retrieve recent MIDI using Retroactive MIDI Capture.
Live recording
Select the track and Tone lane or Drum pad you want to record. Tap Record to enable recording, or double-tap Record to arm it before playback. Armed recording is ready to capture notes when the transport runs; arming alone does not insert notes. Press Stop to finish.
Hold Record to open recording modes and options.
Recording modes
| Mode | Behavior |
|---|---|
| Overdub | Add notes to the sequence. |
| Overwrite | Clear existing trigs as the playhead passes, replacing them with new input where played. |
| Clear on Loop | Keep the last take until you play new notes on another loop. |
| Step Rec. | Enter notes one sequencer step at a time. |
Recording options
| Option | What it changes |
|---|---|
| Quantize | Align incoming notes to the selected recording grid. Off preserves their timing. |
| Auto Grow | Extend an eligible new live recording beyond the current sequence length. |
| Loop End, Stop | Stop recording at the next sequence loop boundary; playback continues. |
| Tie Step Length (Step Record) | Use the sequencer's step length for new notes; off uses the current input Length. |
| CC Automation | Record mapped CC changes alongside notes. See Modulation. |
These settings affect new recordings, not trigs already stored in the sequence.
Step Record
Step Record builds a phrase without playing in time. Select Step Rec. in the Record popup, play a note or chord, and release all held notes to advance one step. Repeat to add more notes.
Tap Shift/Mute in the Control Bar to clear the current step and advance. The cursor loops through the selected sequence range. Select Step Rec. again to return to Overdub.
Retroactive MIDI Capture
MIDI Capture keeps a history of recent notes, even when Record was off. Use it to recover something you just played or heard from the sequencer and place it into a pattern.
As you play live MIDI, the Capture roll appears in the notification strip. Tap it to open the Capture editor. You can also press Capture to reveal the retroactive piano roll, then tap that roll to open the editor.
Select the MIDI source in the editor:
| Source | Notes captured |
|---|---|
| Live | Notes you play live. |
| Seq | Notes played by the sequencer. |
| FX | Live-played and sequenced notes after FX processing—the resulting MIDI output. |
The Control Bar's Capture button also provides shortcuts for other features; here it operates the MIDI Capture editor and history.
Add Captured MIDI to a Pattern
In the Capture editor, drag the range handles to choose the notes to keep, select a destination and press the editor's Capture control to import them.
| Destination | Action |
|---|---|
| New | Import to an empty pattern. |
| Wipe | Replace notes in the destination. |
| Layer | Add notes to the destination. |
| Lane | Import into an empty Tone lane. |
Capture range and scope
- On Drum tracks, choose the full track or one pad for the captured notes.
- Notes crossing the selected range are trimmed to its boundaries. New and Wipe set a sequence length of up to 16 bars.
- FX output captured to a Tone track follows its current scale; Drum output retains drum-note identities. An empty selection cannot overwrite existing notes.
Refresh or leave MIDI Capture
The Capture editor holds its snapshot while you continue playing. Press Capture to refresh it, or Seq to exit without importing. The X beside the notification roll discards that preview.
Loops and pattern conditionals
In SEQ, press Loop to open the Looper keypad for the selected Tone lane or Drum pad. Loop selected bars, or use Bar Remixer to play them in a repeating order. Notes outside the loop stay stored.
Looping
| Gesture | Action |
|---|---|
| Tap a bar | Loop that bar. |
| Hold a bar | Set the end, keeping the start. |
| Double-tap | Reset the loop points. |
With a range selected, ← / → shifts it one bar; + duplicates its bars.
Edit the looped region
Recording and bar edits use the selected range.
Scissors (Slice Loop) keeps only the selected bars, moves them to the start and sets the sequence length to match. Material outside the range is removed.
Bar copy and Drum scope
Hold Copy and tap a source bar, then hold Paste and tap its destination. Paste replaces that bar's content; pasting beyond the sequence end extends it.
Slice Loop affects the active Tone sequence or Drum pad. Linked Drum pads follow the slice. It also resets page/loop points and adjusts the slice resolution.
Pattern Conditional
Pattern Conditional plays a repeating chain of up to 16 steps. Each step plays the ordinary loop, a chosen range or one random bar. A muted step passes silently before the next step begins.
Use Bar Remixer to add, select, mute and reorder the chain’s steps.
Run / Power turns the chain on or off. Turning it off restores the ordinary loop and keeps the chain's settings.
Edit the chain
Tap the Bar Remixer side label when shown, or hold the Looper tab with the Looper keypad selected. The side label opens or closes the editor.
| Area | Use |
|---|---|
| Chain controls — top row | Run enables the chain; Record arms the Bar Remixer recorder; Reset resets the chain. |
| Chain cells — middle | Select, enable/mute and reorder the chain’s steps. |
| Selected-step controls — bottom row | Duplicate, mute, randomize, initialize or remove the selected step. |
With Record off:
| Action | How |
|---|---|
| Select | Tap a cell or sequencer trig. |
| Mute / enable | Tap the selected step again, or press Mute. Muted steps are grey. |
| Reorder | Drag a cell and release, or slide a sequencer trig to its new position. |
| Append | Tap the trailing + to add a default step. |
| Duplicate | Tap the bottom-left paste icon to copy the selected step after itself. |
| Remove | Double-tap a step, or press the bottom-right trash. One step always remains. |
Set a step's range
Select a step with Record off. On the Looper keypad, tap the first bar, then hold the last bar. For a single-bar step, just tap its bar.
Init restores an enabled step that follows the ordinary loop, clearing its custom range and random choices.
Record a bar order
- Select the step to insert after, then tap Record in Bar Remixer’s top row to arm its bar-order recorder.
- Tap Looper bars in order. Each tap adds a step after the selection and selects the new step.
- Tap Record again to disarm the bar-order recorder and edit existing steps.
While recording, tap a cell or sequencer trig to move the insertion point. Mute, Random and Init each add a step of that type. At 16 steps, Record turns off.
Reset, copying and recording cues
- Reset (top row): returns to one enabled default step, keeping sequence notes and the recorder’s armed state.
- Duplicate and reorder: keep each step's range, random choices and mute state together.
- Recording cues: pink/purple marks armed recording; Init lights for a default step. New Mute and Init steps use the ordinary loop's duration.
- Looper tools: scissors, range-shift arrows and bar duplication appear in ordinary Looper mode.
Choose random bars
With Record off, select a step and press dice / Random. Tap Looper bars to include or exclude them. The step plays one chosen bar per visit; no selection allows all bars.
Press Random again to clear its choices and reset its range. You can then assign a fixed range.
Trig Tools
In SEQ, open Trig Tools beside the sequencer to access Import, Randomizer and Grow. The button shows the last tool used; press it to open the tool tabs.
MIDI Import: bring in a MIDI phrase
Select the destination Tone lane or Drum track. Open Trig Tools → Import, then press Choose Folder. Tap the folder name at the top to switch folders later.
In the file list:
| Tap | Result |
|---|---|
| Import icon beside a file | Import editable trigs directly, replacing the active Tone lane or the 16 Drum pad sequences. |
| Filename | Load the phrase into a Staging slot to play or arrange before importing. |
Direct import mapping
- Tone: Notes follow the current scale; velocity and length are retained. Correct the detected source key and re-import if needed.
- Drum: Notes map by configured Pad Types, then related types or available mapped pads. Unmatched notes are skipped; pad MIDI Output settings stay unchanged.
- Leading empty bars are removed. Import preserves the first note's position within its bar and includes up to 16 bars.
Staging: play MIDI phrases from the keypad
Staging has 16 slots in the Tone bank and 16 in the Drum bank. Load MIDI phrases into the slots, then play them from the keypad, arrange them with the Slot Sequencer, or import them as trigs.
Load and choose a phrase
Select another slot to load more files. To replace a slot’s phrase, tap its filename above the preview; browse with Previous, Next or dice.
Drag the preview handles to set its playback range, drag inside to move it, or double-tap to reset.
MIDI note mapping
Tone: Correct the source key and press Reimport if needed. Drum: Configure matching Pad Types in the Drum profile; unmapped parts cannot play.
Play slots from the keypad
Select a Tone or Drum track and tap a loaded slot to play its phrase through that track.
Keypad playback controls
| Control | What it does |
|---|---|
| Full / Hold | Full plays the range once; Hold repeats it while the slot is held. |
| Latch (∞) | Keeps a slot playing after release; tap it again to stop. |
| Mono | Replaces other slots playing on that track in the same bank. |
| Choke Track | Suppresses the track's ordinary sequence while the slot plays. |
Use MIDI Capture to keep a live performance of your slots.
Arrange slots with the Slot Sequencer
Each bank has one Slot Sequencer. Slots act like notes: select a slot on the keypad, then tap sequencer steps to place trigs that launch it.
Turn Slot Sequencer on from the track you want to play through. Hold a trig and tap another slot to change its assignment, or tap a later step to set the launch duration. To change the destination, select another track of the same type and toggle Slot Sequencer off and on there.
Editing launch trigs
Tap a filled trig to remove it. Hold a trig and tap the end of its existing tail to return it to one step. The usual sequence length, resolution and page controls apply.
Import Staging into a pattern
Press Import (in place of Lab). Choose Slot or Sequence, then Wipe to replace notes, Overdub to add them, or Add to New for a new Pattern. Press Import to apply. The slots remain loaded.
Import destinations
Tone Wipe replaces the active lane; Drum Wipe replaces all pad sequences. Overdub updates overlapping note positions. Add to New needs a free Pattern. File CC automation is not imported.
Manage slots
Randomize All replaces unlocked slots with files from their folders. Hold Capture and tap a slot to lock it; Trig Lock protects sequenced slots.
Copy/Paste: hold the command and tap its source or destination slot. The phrase and range are copied. Keep source MIDI files when moving projects.
Randomizer
Open Trig Tools → Randomizer to generate new trigs or remix existing ones. It replaces notes within the selected range, leaving the rest untouched.
| Control | Action |
|---|---|
| Tone: Chord / Bass / Melody | Choose the kind of phrase. |
| Drum: Cur. / Sel. | Target the active pad or a selection of pads. |
| Genre | Choose the musical style. |
| Range handles | Set the region to replace. |
| Gen New / Remix Amt | Generate new at 100%, or remix existing notes at lower values. |
| XY | Right: Density · Left: Length · Up: Movement · Down: Groove. |
| Dice | Apply the result as editable trigs. |
Tone Randomizer
Tone genres include House, Techno, HipHop, Trap, DnB, Soul and Ambnt.
Drum Randomizer
Locked pads are excluded from Drum randomization.
Grow
Open Trig Tools → Grow to change note lengths or the sequence's size.
| Control | Result |
|---|---|
| Clone | Append a copy of the sequence, doubling its length. On Drum, tap for the active pad or hold for all pads. |
| Legato | Extend note lengths to the next event. |
| Staccato | Set note lengths to one beat (quarter note). |
| Piano roll drag left/right | Shrink or stretch the sequence, scaling note positions and lengths. |
Note length behavior
Legato reaches across loop boundaries, including the last Drum hit to the first. These tools edit stored notes; Seq Setup's Legato changes playback only.
Shift note timing and pitch
Use Shift Trigs arrows to move stored trigs left/right in time, or up/down in Tone pitch. In Trig Focus, the arrows affect only the selected trigs.
Quantize and Trim
Go to SEQ → Transformation keypad → Quantize. For quick access, hold Seq Setup, then press Quantize.
Choose Quant To for the timing grid and Amount for how far notes move toward it (0% unchanged, 100% fully quantized). Adjust the range with its handles; drag inside to move the range, or double-tap to reset it. On Drum, select Pad or Track, then press Quantize to apply.
On Tone, Trim removes notes outside a selected partial range. Notes quantized to the same position merge into one trig.
Track Routing FX
Track Routing has three modes: Peek shows another track's trigs, Echo plays its notes, and Melt uses a source's pitches with the destination's timing.
On the destination track, open Seq Setup and choose the routing mode. Use the sequencer trigs to select the source track, then the keypad to select its Tone lane or Drum pad. Double-tap the active mode icon to reset the route.
Peek
Peek overlays the source’s placed trigs on the destination sequencer for visual alignment. It does not copy them.
Echo
Echo plays the source's note trigs as the destination sequence. The destination can change its loop, length, shifts and FX; the note trigs remain on the source.
Tone Echo initially follows the source's length, loop points, Step Shift and Octave Shift. Changing a destination shift makes only that shift independent. Reset Echo and reselect the source to relink. Drum Echo can use another pad in the same Drum track.
Paste as notes: hold Copy or Paste, then choose Paste Here or, on Tone, Paste New Ptrn. Pasting ends Echo and creates editable notes.
Melt
Melt uses the destination's trig timing, length and velocity with pitches from a Tone source. The destination keeps its own FX.
Tone Melt
Select a Tone source. Its notes or chords provide pitches for the destination's trigs.
Melt keypad controls
- Upper eight keypad pads: choose notes from the source chord, lowest first. With Mono off, choose several; hold one to focus it.
- Lower eight pads: shift selected notes by scale steps or octaves.
- Mono: choose one indexed source note, or tap it again to use the whole chord.
- Melt Source: open the source track.
Hold Capture and choose Here (current sequence) or New (new Pattern) to turn Melt into editable notes.
Drum Melt
Drum Melt combines the selected Drum pad's trig timing and velocity with pitches from a Tone source.
- On a Drum track, open Seq Setup → Melt. The source selection, Melt filter and output-track controls appear together.
- Use the sequencer trigs to choose the source track and the keypad to choose its Tone lane.
- Use the Melt keypad to select the Tone tracks receiving the result. Set their processing in the Melt filter.
Drum Melt filter
Choose Output Trk to edit that output's settings; output-track routing is selected on the Melt keypad.
| Control | Effect |
|---|---|
| Step / Oct | Transpose the source pitches by scale steps or octaves. |
| POLY | Limit how many notes of the source chord pass, from one (Mono) to eight (Poly). |
| Choke / Velocity | Change note lengths or velocity. |
| Strum | Stagger chord notes; hold for Humanize. |
| Filter | Apply or bypass the Drum pad's shared filter on this output. |
| To Warp / Warp Seq | Apply the receiving track's Warp; choose its Tone lane (1–4) for Warp settings. |
Filter parameters are shared by the Drum pad; Filter, To Warp and Warp Seq are chosen per output.
Track FX
Track FX shape MIDI playback without changing stored trigs.
| FX | What it does |
|---|---|
| Arp | Repeats notes in a chosen order and step pattern. |
| Euclidean (Drum) | Distributes hits evenly across a repeating cycle. |
| Gate | Filters notes by velocity or pitch and remaps velocity. |
| Harmonizer | Adds scale-based harmony and changes between chord voicings. |
| Hue | Sequences pitch shifts over time. |
| Speed | Plays a sequence faster or slower. |
| Warp | Shifts, filters and randomizes the notes a sequence outputs. |
Press FX to open the current track's last-used effect; press it again for the FX chooser. The button shows that last-used effect.
FX scope and organization
| FX | Scope | Saved to |
|---|---|---|
| Arp | Track | Pattern |
| Euclidean | Drum pad | Pattern |
| Gate | Lane / pad | Pattern |
| Harmonizer | Song | Scene |
| Hue | Song | Scene |
| Speed | Lane / pad | Pattern |
| Warp | Lane / pad | Pattern |
Changes to a shared Harmonizer or Hue pattern affect every track using it.
Arp
Arp plays incoming notes in a repeating order. Style chooses the note order, Rate sets the pace, and Steps shapes the phrase.
| Style | Plays the incoming notes… |
|---|---|
| Up / Down | From low to high / high to low. |
| UpDown / DownUp | Back and forth, starting in either direction. |
| Chord | Together. |
| Pick | By numbered note (1–8) chosen on each Arp step. |
| Rnd | In random order, choosing again for each event. |
| R.Unq | From a shuffled set, using every note before reshuffling. |
| R.Hld | In a shuffled order kept until the incoming chord changes. |
Choose OFF in Style to stop the Arp. Shift + Style mutes or unmutes it without losing the current setup. Set Rate for spacing (hold for synced/free), Choke for note length and Human for variation (hold for Chaos).
Edit Arp steps
Arp steps modify the notes produced by Style. Select a step on the grid to edit it.
Quick edits: Use the Arp tab keypad to set a step's pitch shift, skip or velocity offset. The controls below the sequencer let you mute the selected step, give it a random tone or reset it to Init Step.
Detailed edits: Hold a step to open its editor. In the piano roll, drag vertically for pitch, horizontally for Choke, or drag its dotted line for duration.
| Step control | Effect |
|---|---|
| Pitch / Vel | Shift the note in scale steps / offset its velocity. In Pick style, Pitch chooses an incoming-note number. |
| Length / Split | Set how many Rate ticks the step lasts / divide them into repeats. |
| Choke | Change played note length. |
| Chance / Every | Set when the step plays. |
| Chaos | Add variation to this step. |
Change the step count beneath the grid.
Step length and copying
Length covers 1–8 Rate ticks; Split divides it into 1–8 parts. Step Choke runs 1–200%, Vel −100 to +100. Hold Capture and tap a step parameter to edit that parameter across steps. Copy/Paste of a step includes its settings; Config controls failed Chance/Every conditions.
Arp Cycle
Cycle changes the phrase as it repeats.
| Control | Effect |
|---|---|
| Shape Offset | Start elsewhere in the incoming-note order. |
| Climb / # Times | Transpose successive cycles / set how many times to climb. |
| Fade | Reduce velocity across cycles. |
| Repeat | Set the number of cycles, or ∞ to repeat continuously. |
Arp Config
Config determines how the steps play. Style orders incoming notes; Direction orders the programmed Arp steps.
| Control | Effect |
|---|---|
| Direction | Forward, reverse, alternating or random step order. |
| Swing / Legato | Change groove / let notes fill their step duration. |
| Restart | Control whether incoming sequence trigs restart the Arp. |
| Cond:Play / Cond:Shift | Skip a failed conditional step, or play without its pitch shift. |
Arp Transformations
Use Transformations to change stored Arp steps: Random changes values, Clone extends a phrase, Stretch adds space, Shift moves steps, and Reset restores the pattern. Clone copies pitch/velocity into new steps; inspect other step settings afterward.
Euclidean (Drum)
Euclidean spreads drum hits evenly through a repeating cycle—for example, 5 Pulses across 16 Steps. On a Drum pad, choose Euclidean → Notes:
| Notes control | What it does |
|---|---|
| Steps / Pulses | Cycle length (2–32 steps) / number of hits (up to Steps). |
| Offset / Rate | Rotate the hits / choose the time between steps. |
| Velocity / Choke | Set their strength / note length. |
| Dice | Randomize the selected layer. |
Play alongside the regular sequence
The Notes layer plays alongside the pad's stored trigs. Use the transformation keypad to control how they interact:
| Control | What it does |
|---|---|
| Trig Len | Let existing trigs block Euclidean hits for their whole duration, or only at their starts. |
| Seq Len | Restart the Euclidean cycle with the pad sequence, or let it run independently. |
| Trk FX | Send Euclidean hits through the pad's normal sequence/FX processing, or bypass that processing. |
Add velocity accents
Vel A and Vel B add repeating velocity accents, not extra hits. Set Steps, Pulses, Offset and Tar Vel for each. If both accents land on a hit, Vel A takes priority.
Capture as ordinary trigs: hold Capture and tap the center of the Euclidean ring. Prism adds the generated hits to the pad's current loop and mutes the Notes layer. Existing trigs remain, and existing starts win any collisions.
Euclidean layer shortcuts
Shift + center mutes the selected Notes/Vel A/Vel B layer. Copy/Paste at center copies timing and pulse settings, not Notes Velocity/Choke. With Trk FX off, Euclidean bypasses Warp and Gate but retains groove, velocity offsets and muting.
Gate
Gate filters notes by velocity and, on Tone, pitch. Drag the rails to set the ranges:
| Gate control | What it does |
|---|---|
| Velocity (left) | Rejects incoming notes outside the selected velocity range. |
| Lim (right) | Rescales velocities that pass into a chosen output range. |
| Pitch (bottom, Tone) | Rejects notes outside the selected pitch range. |
| Double-tap canvas | Resets the Gate ranges. |
Lim rescales passing velocities to the chosen output range.
Gate range details
Velocity and pitch use MIDI 0–127, including endpoints. Drum Gate has no pitch rail.
Harmonizer
Harmonizer adds notes at chosen scale intervals above or below incoming notes. For example, add a third and fifth to make a triad. Each Harmonizer pattern contains four pools (A–D) for different chords or voicings.
Eight Harmonizer patterns can run at once. On the Pattern/Scene keypad, choose which Harmonizer pattern the current track uses. Several tracks can use the same pattern, so editing it changes their shared harmony.
Choose pool A, B, C or D, then build its harmony on the keypad:
| Keypad control | How to use it |
|---|---|
| Scale-degree pads | Each position represents an interval from the incoming note. Tap an unlit pad to add that degree; tap a lit pad to select it; hold a lit pad to remove it. |
| Octave pads | Add or remove octave copies of the selected scale degree. |
| Root | Keep or remove the original input note. |
| Chance | Set how often added harmony voices play. |
Hold an empty degree pad to move the keypad root; hold the root to clear the pool. Hold Copy, Paste or Mute and tap a pool to copy, replace or mute that pool.
Pool comparison
Hold another pool to toggle Watch and see its interval labels while you edit the current pool. Each pool stores up to seven added intervals.
Sequence Harmonizer pools
To cycle between two voicings, build pools A and B. Set Start On A, Length: 1 Bar for both, A → Next B, and B → Next A.
| Control | Meaning |
|---|---|
| Start On | Starting pool (A–D), X for a fixed pool, or dice for random start. |
| Length | Time before moving: a number of bars (B), processing hits (T), or ∞ to stay. |
| Next | Next pool: A–D, forward/reverse arrows, random dice or X to stay. |
| Restart | When to return to the starting pool; ∞ disables timed restart. |
| Pool Link | Shares Length and Next settings across all four pools. |
| To Warp | Applies the selected sequence's Warp polyphony selection to generated harmony. |
The selected Harmonizer pattern and its pool sequence are shared by every track routed through it.
Harmonizer pool copying
Copy/Paste on the Harm pattern transfers all shared pools and their sequencing; Copy/Paste on a specific A–D pool transfers that pool only. Hold Length or Next to adjust all pools together.
Hue
Hue works like a note sequencer, but its trigs store pitch shifts instead of notes. Set a Shift amount and tap an empty step to place it. Use Length, Chance and Every as you would for ordinary trigs; hold a shift trig to edit it.
Choose what Hue affects: press Current to toggle Hue for the current lane. Press the track dots to enter routing selection: the sequencer trigs show tracks and the keypad shows lanes. Tap a track trig to select it (pink), then tap keypad pads to toggle its lanes. Hold or double-tap a track trig to turn Hue off for all its lanes.
| Control | What it changes |
|---|---|
| Shift | Pitch change in scale degrees, or semitones in chromatic mode. |
| Length | How long the shift stays active. |
| Chance / Every | Whether the shift applies on a given visit. |
| Hue sequencer | The timed shift pattern, with its own length, loop, grid and speed. |
For example, a +2 trig shifts participating notes up two scale steps while it lasts. You can also play shifts live from Hue's keypad and record your performance.
Hue patterns can be shared across participating tracks; Scenes recall the selected Hue pattern. Hue Pattern Copy/Paste appends shift trigs to the destination rather than replacing its existing events.
Speed
Speed changes how quickly a sequence plays without moving the trigs stored in it. Drag the Speed graphic to set the rate from 1/8× to 8×, or tap a ratio shortcut. Tap the selected shortcut again for normal 1× speed.
Linked Drum pads can share playback timing.
Warp
Warp shifts, filters and randomizes the notes sent by a sequence. Its changes happen during playback; the stored trigs stay as they are.
| Warp control | Effect |
|---|---|
| Step / Oct (Tone) | Shift output pitch in scale steps or octaves. |
| Poly / LOW, MID, HIGH, ALT. (Tone) | Limit chord notes and choose which voices remain. |
| Random Tone / Range (Tone) | Randomly shift pitches; hold Random Tone to set the maximum range. |
| Choke | Shorten or lengthen notes. 100% preserves their ordinary length. |
| Rnd Choke / Rnd Vel | Vary note length or velocity on playback. |
| Rnd Skip | Randomly omit notes. |
| Strum (Tone) | Spread chord notes in time; negative values reverse their order. Hold Strum to adjust Humanize, which varies the spacing. |
Drum Warp: Swap and Layer
Drum Warp can replace or double a pad's hit with another pad's sound, without copying its sequence.
Choose a pad, then use Warp's partner selector to choose eligible pads on the keypad. Tap a partner to include it; tap the selector again to exit (hold it to clear the partners).
- Rnd Swap sets the chance that a partner sounds instead of the source pad.
- Rnd Layer sets the chance that a partner sounds along with the source pad.
Both need selected partners and a value above zero. Drum Lab's fixed layers remain separate from these randomized options.
CC profiles and P-Locks
A CC profile maps Prism controls to an instrument's MIDI parameters. Save a profile once and load it in other projects. Use its controls for live adjustments, automation and P-Locks.
Load or create a profile
Open CC on a track, then Open CC Profile. Choose a saved profile and press Open, or start with Default [1x8], Default [16x8] or New Profile.
Hold CC to switch between loaded profiles, press Edit to configure one, or + to load another. Each track can hold up to four profiles.
Profile library controls
Cancel closes the library. Remove unloads the selected profile without deleting its saved copy. Back closes the loaded-profile selector.
Configure a profile
Press Edit. The three tabs set up different parts of the mapping:
| Tab | What it controls |
|---|---|
| Prof | Profile name and MIDI channel. |
| Grp | Groups, their names, colors and channels, and Drum pad links. |
| CC | Individual mapped parameters. |
In Grp, use the keypad to add a group with an empty pad or select an existing group. Each group contains pages of eight parameters. For Drum tracks, Link to Pad connects a group to a specific pad so its mapped controls follow that pad.
Group channels and colors
TRK uses the track's MIDI channel; groups and individual parameters may use their own channel. Group colors identify mappings but do not change Drum pad colors.
Add and edit CC parameters
In CC, choose a group on the keypad. The sequencer steps show its parameter slots: tap + to add one, or tap a filled step to select it.
| Shortcut | Action |
|---|---|
| CC# | Change the selected parameter's MIDI CC number directly. |
| Hold parameter | Edit its name, CC number, channel, initial value, range and display type. |
| Auto CC / Next Free CC# | Choose an unused CC number. |
| Clone Param | Duplicate the mapping. |
| Arrows | Move between parameters. |
| Trash | Remove the selected parameter. |
Display types
Raw (#) shows numeric CC values; % and BI% show percentages; On/Off is a switch; X Choices / #X shows discrete choices; Blank leaves an empty position.
Copy a group
From the group keypad, hold Copy and tap a source group. Hold Paste, choose CC: Fresh for unused CC numbers or CC: Raw to keep the original numbers, then tap an empty group pad.
Save profile settings
Tie To Sound or Tie To Pattern determines which selection recalls a mapped parameter's value. These values belong to the Sound or Pattern; the CC mapping itself stays reusable. Sync All activates mapped values, while Desync All deactivates them.
Press Save to update the library profile, As to save a new copy, or Exit to leave the editor. Save the Prism project separately to retain its loaded profiles and values.
Control mapped parameters
Mapped parameters stay in the CC view while the keypad lets you jump between groups. Use the left/right arrows to change pages.
- Drag vertically to change a value and send MIDI CC.
- Tap to increase it by one; double-tap to reset it to its configured initial value.
- Hold a parameter to open Parameter Motion, with three LFO controls and access to its automation lane.
Parameter Motion controls
Adjust an LFO row to set its amount. Hold the row to change direction; double-tap to remove its assignment. Auto opens the parameter's automation lane. Holding a parameter here opens Parameter Motion; holding it in the profile editor opens its mapping settings.
P-Locks
A P-Lock stores a mapped CC value for a trig without changing the parameter's base value.
- Select one or more trigs in Trig Focus and press CC.
- Adjust a parameter to add a P-Lock. Parameters with P-Locks glow green.
- Use Smooth for a gradual change into the locked value.
- Double-tap a green parameter to remove its P-Lock from the selected trigs.
Rapid P-Locks
Hold Seq Setup, then tap a glowing parameter. The display becomes a row of bars, one per sequencer step. Drag across the bars to set values; steps containing trigs receive P-Locks.
P-Lock overview — circled keyhole
Tap the circled keyhole beneath the parameter grid to see the selected trigs' P-Locks. Tap a row's X to remove one, or Trash to clear P-Locks in that context without deleting notes.
P-Lock playback settings
In the P-Lock controls, Chance and Every choose when a P-Lock plays; Jitter varies its value. The Transformation keypad controls when it releases:
| Setting | Result |
|---|---|
| Standard | Return to the parameter's base value at note-off. |
| P-Lock Legato | Keep the P-Locked value until the next trig. |
| P-Lock Trigs Resets | End an overlapping P-Lock when a new trig plays. |
P-Locks and other CC movement
A parameter may also use automation, LFOs or macros. Their editing and clear gestures are separate. Jitter does not apply to On/Off or discrete-choice parameters.
CC-XY Pads
The CC-XY Pads let you quickly assign mapped parameters to two XY pads and morph their values together.
| Control | Action |
|---|---|
| Target | Reveal X:1, Y:1, X:2 and Y:2. Choose an axis, press Map, then tap the parameter to assign. |
| Dice | Randomly assign parameters from the current group and page. |
| Row selector | Assign the current page's top or bottom parameter row to the four axes. |
Drag either XY pad to change its assigned parameters together.
CC macros
A CC macro controls several mapped parameters at once. Macros 1–2 use vertical pads; 3–4 use the macro panel's XY axes.
Press Map, choose macro 1–4, then adjust mapped parameters to set their contributions. Double-tap an assigned parameter to remove it; Trash clears all targets for that macro. Press Back to use the macros.
| Control | Action |
|---|---|
| Press / release | Apply a macro momentarily. |
| Lock | Keep the macro engaged after release. |
| Shift + dice | Randomize the corresponding macro. |
| Capture | Keep the resulting mapped parameter values. |
Song Performance macros control these same macros across all tracks simultaneously.
Track PC, Pressure and Mod controls
The CC home controls provide PC, Pressure, Mod 1 and Mod 2 without a loaded profile. Drag to change their values. Hold a Mod control to set its CC#, then hold it again to return. Hold PC to choose a random program. Without a profile, the XY area controls Mod 1 and Mod 2.
Modulation
LFOs move parameter values automatically. Prism has three LFOs shared by its internal controls and three separate LFOs for mapped CC parameters. The same LFO buttons access the appropriate set. Each LFO's settings and assignments are saved with the Pattern (internal) or Sound profile (CC).
Assign or remove an LFO
- Tap an LFO button to arm it.
- Adjust a parameter to set the modulation amount.
- Hold the parameter to switch between Unipolar and Bipolar movement.
- Double-tap the assigned parameter while the LFO is armed to remove its assignment.
An LFO can control several parameters. Tap its LFO button again to leave assignment mode.
Parameter Motion Engine (CC)
Hold a mapped CC parameter to open the Parameter Motion Engine. Its three LFO rows adjust modulation amounts; hold a row to change direction or double-tap to remove an assignment. Expand Auto to edit the parameter's automation.
Edit an LFO
Hold an LFO button to open its editor. Choose the waveform and timing, then shape the movement in the waveform display.
| Control | Purpose |
|---|---|
| Shape | Sine, Saw, Triangle, Square or Random; also Custom Wave and Draw Wave |
| Rate | Cycle speed. Hold Rate to switch Sync/Free; Linked Pattern follows sequence loop length. |
| Mode | When the LFO runs or restarts (below). |
| Depth | Overall movement strength and direction. |
| Waveform | Drag to adjust Wave Slope (shape) and Phase Shift (starting point). |
| Mode | Behavior |
|---|---|
| Run | Runs continuously. |
| Trig | Restarts on played trigs. Long-press Mode to select the lane. |
| Hold | Samples a value on a trig and holds it. |
| Half | Plays half a cycle. |
| Once | Plays one cycle. |
| Pattern | Plays a cycle with retriggering. |
LFO-to-LFO modulation
While editing an LFO, long-press another LFO tab to activate it as the modulation source. Then adjust the current LFO's parameters to assign modulation from that source.
Modulation cascades: LFO 2 or 3 → LFO 1, and LFO 3 → LFO 2. LFO 3 cannot be modulated by another LFO.
Manage LFO targets
Open the LFO's target list to change its assignments without editing the waveform.
| Control | Result |
|---|---|
| Amount | Sets how strongly the target moves; negative reverses direction. |
| Unipolar / Bipolar | Moves to one side of the starting value / to both sides. CC targets may offer Proportional. |
| X | Removes that target. |
| Shuffle | Changes amounts, keeping the same targets. |
| Target dice | Replaces targets with activated mapped CC parameters. |
Custom Wave
Custom Wave builds one LFO cycle from shaped segments. Use the three editing areas together:
- Choose a segment in the sequencer and select its shape from the keypad.
- In the waveform display, drag up/down for depth or left/right for duration.
- Use + to add a segment, − or double-tap to remove one, and Trash to reset the wave.
For the selected segment, Tension curves its shape, Multiplier scales it, and Chance / Every determine when it contributes. A wave can contain up to 16 segments.
Draw Wave
Draw Wave turns a gesture into a repeating LFO shape. Drag across the waveform to draw a curve, or enable Record and move your finger up and down as the LFO runs. Record captures your hand movement like automation, but saves it as an LFO waveform.
Choose a 2, 3, 4, 8 or 16-part grid for editing. Shift + vertical drag moves a section of the wave without changing its shape.
Mute, copy and save LFOs
| Control | Action |
|---|---|
| Mute | Pause the LFO without removing its target assignments; tap again to resume. |
| Copy / Paste | Transfer LFO settings to another LFO. Target assignments are not copied. |
| Preset Save / Load | Save or recall the LFO's settings and targets together. |
| Hold Reset / Trash | Reset the LFO and remove its targets. |
LFOs are saved with their Pattern or Sound. Use a preset to reuse a complete LFO setup elsewhere.
Record CC automation
CC automation records movements of mapped parameters into the current Pattern, then plays them back with the sequence.
- In the Record menu, enable CC Automation, then turn on Record.
- Play the Pattern and move a mapped CC parameter to record its changes.
- To review the result, hold the parameter to open the Parameter Motion Engine, then expand its Auto preview.
Ordinary recording initially follows the Pattern's length. Continue past its end to extend the automation in whole-bar increments, spanning multiple Pattern loops.
Quick capture: During playback, hold Capture and drag a mapped parameter. The automation range runs from touch-down to release, rather than snapping to the Pattern's boundaries.
Edit and manage CC automation
Hold a mapped CC parameter to open the Parameter Motion Engine, then expand its Auto preview to edit the recorded lane.
| Editor tool | Action |
|---|---|
| Move | Move the whole curve in time or adjust its Amount vertically. |
| Select | Select a range and move or tilt its values. |
| Stretch | Expand or compress the curve in time. |
| Split | Edit one section of the curve. |
Use the range handles in Move to set the automation loop. Back returns to the CC controls.
Manage the lane
From Parameter Motion, use these gestures on Auto:
| Gesture | Result |
|---|---|
| Shift + Auto | Mute or unmute automation without deleting it. |
| Double-tap Auto | Clear the lane. |
| Copy + Auto, then Paste + Auto on another parameter | Copy its automation. |
You can also hold Capture and double-tap an ordinary CC parameter to clear its automation. An ordinary double-tap without Capture resets the parameter's default value.
Draw CC automation
To draw instead of record, expand the same Auto preview and drag across the curve: horizontal position is time, vertical position is value. Use the editor tools above to refine it.
Copying automation
Copying automation transfers the curve, starting value, Amount, loop and settings. The destination keeps its own CC mapping. Automation is saved with the track's Pattern.
Patterns, Sounds, Scenes and Mute Profiles
Patterns and Sounds define a track's music and instrument sound. Scenes bring the tracks together, while Mute Profiles let you recall which parts play.
| Object | What it holds | Available |
|---|---|---|
| Pattern | A track's sequences and FX state. | 32 per track |
| Sound | Mapped CC values for the connected instrument, like an instrument preset. | 32 per track |
| Scene | A saved combination of all tracks' selected states. | 64 per project |
| Mute Profile | The mute states of all tracks, Tone lanes and Drum sequencer pads in that Scene. | 8 per Scene |
Select and recall
Open the Pattern/Scene keypad tab. Tap the tab again to switch between its two layouts:
- Main selector: The top rows select Pattern, Sound, Mute or Scene. The main grid selects a slot; the bottom row selects its bank.
- Fast-access selector: Select a Pattern or Scene directly, without choosing an object type first.
On larger screens, the top object bars also select items directly (two rows in AUv3, three in standalone). On iPhone, use the keypad. The current selection is highlighted.
Tap a filled slot to recall it. An empty Pattern is ready for new material; an empty Scene or Mute Profile captures the current state. Patterns update as you edit. Sound values and changes to Scenes or Mute Profiles are saved when you switch away, unless Scene updates are locked (see settings below).
Switch temporarily
During playback, hold a Pattern, Sound, Scene or Mute Profile on the keypad or top bar to use it temporarily. Release to return; tap to keep the new selection. When stopped, holding a Scene on the keypad opens its Scene controls instead.
Patterns and Sounds
Edit the selected Pattern in the sequencer or FX controls. Selecting a Sound recalls the connected instrument's saved mapped CC values without changing the Pattern's notes. Copy a Pattern to another slot before editing an independent variation.
Saving mapped CC values
In a CC profile, Tie To Sound stores a parameter's value with the selected Sound; Tie To Pattern stores it with the selected Pattern. The mapping itself remains reusable. See CC profiles and P-Locks for setup.
Scenes
A Scene recalls a combination of track states with one selection.
- Choose the Patterns and Sounds, then adjust the track settings and mutes you want.
- In the Scene keypad, choose a bank and tap an empty Scene to capture them.
There are eight banks of eight Scenes. Select a saved Scene to recall its combination.
What a Scene recalls
| Part | Recalled state |
|---|---|
| Track selections | Each track's Pattern and Sound, including the FX state saved with them. |
| Track settings | Mixer and lane/pad velocity offsets, two track modulation values and base pressure. |
| Mutes | The selected Mute Profile, including parts that were empty when captured. |
| Shared selections | The global Hue Pattern and Chord Blocks bank. |
A Scene references its Patterns and Sounds rather than copying them. Editing a Pattern also changes what other Scenes using that Pattern will recall.
Fresh Scenes and updates
Shift + empty Scene captures a Fresh Scene with empty Patterns. A track with no empty Pattern available is muted.
Updating an existing Scene also updates its active Mute Profile; its other Mute Profiles, color and link settings are retained.
Mute Profiles
Each Scene has eight Mute Profiles, each storing a different combination of mute states without changing the selected Patterns or Sounds.
Capture a mute variation
Select a Scene, set the track, Tone lane and Drum pad mutes, then tap an empty Mute Profile to capture them. Tap a saved profile to recall it.
Smart muting: If a part was empty when you captured a Scene, adding material to it later while working in a different Scene will not make it play in the original Scene. Unmute that part in the original Scene when you want to hear it there.
Song steps can recall a Scene and Mute Profile together.
For ordinary track, lane and pad muting, see Interface and Control Buttons.
Copy, reorder and remove
| Action | How |
|---|---|
| Copy / Paste | Hold Copy and select the source; hold Paste and select the destination. |
| Reorder — top bar only | Hold and drag the Pattern, Sound, Scene or Mute Profile within its top object bar. |
| Remove — top bar only | Drag the item to the trash that replaces the settings Prism. |
Copied Scenes still reference the same Patterns and Sounds. Copy a Pattern separately to give the new Scene different notes.
Scene keypad controls
With playback stopped, hold a Scene on the keypad to open its controls. Use the left/right arrows to move it one position, the first eight sequencer trigs to choose its color, or hold trash to clear it. These keypad controls are separate from dragging items in the top bars.
Selection settings
In Menu → Playback & Song, choose how selections behave:
| Setting | Result |
|---|---|
| Link Patterns & Sound Profiles | Selecting a Pattern also selects its matching Sound; off keeps them independent. |
| Quantize Pattern Changes | During playback, apply Pattern selections at the next bar. |
| Quantize Scene Changes | During playback, apply Scene selections at the next bar. |
| Restart Pattern on Scene Change | Controls Pattern restart when Scene quantization is off; Song steps have a separate Continue/Reset choice. |
Shift + selection reverses the relevant quantization setting for that change.
Lock Scene and Mute Profile updates
Normally, switching away from a Scene or Mute Profile saves the current state to that slot. Enable Lock Scenes to recall saved Scenes and Mute Profiles without overwriting them automatically.
Find Lock Scenes in Menu → Playback & Song, or to the right of the Scene keypad, above its label. Empty Scene and Mute Profile slots can still capture new states while locked.
Songs
Song Mode arranges changes to Prism's project state over time. Each Song step can recall a Scene and Mute Profile, or capture the current state directly. Set how long each step plays, then let the Song move through them.
Add Song steps
Open the Song Sequencer and tap the add position after the last step. Menu → Playback & Song → New Step Behavior determines what the new step saves:
| Step type | What it recalls |
|---|---|
| Linked (relative) | The current Scene and Mute Profile. Later changes to either are reflected in the step. |
| Unlinked (absolute) | A snapshot of the current track Pattern/Sound selections and related project state, including mutes. Later Scene changes don't replace this snapshot. |
Song pages: The Song grid shows 16 steps per page and supports 16 pages. Move between Song pages to reach later steps; the add position follows the existing steps.
Edit Song steps on the grid
Tap a Song step to select it. The step you're editing can be different from the one currently playing.
| Grid gesture | Action |
|---|---|
| Tap | Select a Song step for editing. |
| Capture + tap | Replace that step with the current state as an absolute step, keeping its length. |
| Shift + tap | Mute or unmute the step. Muted steps are skipped during Song playback. |
| Double-tap | Toggle looping on that Song step. |
Song track tiles
The 16 track tiles display each track's Pattern and Sound. Tap a tile to select its track, double-tap to toggle its mute, or drag its value to adjust its velocity offset (−100 to +100).
Song step editor
Select a Song step to open its editor. In the bottom tab, tap To End or the displayed count to choose its length. Select Bars or Loop, then a count (0–16).
| Control | Action |
|---|---|
| Bars / Loop | Set the step's duration in bars or cycles of the target track's longest Pattern. |
| 0 / To End | Play for one longest-sequence span, not indefinitely. |
| Cont. / Reset | Continue or restart Pattern playback positions when the step loads. |
| Update | Capture the current state as an absolute step. A linked step becomes absolute and its length changes to To End; an already-absolute step keeps its length. |
| Left / right arrows | Move the selected step in the Song. |
| Capture + arrow | Duplicate the step to that side. |
| Trash | Remove the selected step. |
The playback-position choice is saved with the step, separately from its length. A duplicated linked step keeps its Scene and Mute Profile references; a duplicated absolute step keeps its own snapshot.
Play and navigate Song steps
Turn Song On to play the arranged steps. The Song advances through them according to their lengths.
| Control or gesture | What happens |
|---|---|
| Song Off / On | Disable or enable Song playback. |
| Restart | Restart the Song from its beginning. |
| Forward | Skip to the next Song step. |
| Back | Restart the current step, or move to the previous one when near its beginning. |
| Hold a Song step | Start playback from that step. |
Use Song page navigation to reach later steps without changing their order.
Randomize the current state
Song's dice changes Prism's current Pattern, Sound and mute selections without editing stored Song steps. Choose All, Tone or Drum for the affected tracks, then toggle P (Patterns), S (Sounds) or M (mutes). Press dice to randomize those choices. The Song chain stops, leaving the new state active.
Save to a Song step
Hold Capture and tap an existing Song step to replace it. To add the result at the end, set Menu → Playback & Song → New Step Behavior → Unlinked, then tap the add position.
Randomization limits
Only tracks with available alternatives change. Pattern or Sound randomization needs another eligible choice; mute randomization can affect Tone lanes and Drum pads but avoids muting every eligible track. Close the dice controls with the arrow/dice-tab control.
Song Performance FX
Song Performance FX temporarily reshape the MIDI Prism is playing. Retrigger a rhythm, repeat a phrase, sustain notes, shift Tone pitches or move mapped controls—all without changing stored Patterns or Song steps. The current effects are quantized.
| Effect | What it does |
|---|---|
| Roll | Rapidly retriggers playing notes at a chosen rate. |
| Repeat | Captures sounding notes and repeats them rhythmically. |
| Hold | Sustains captured notes until the effect ends. |
| Tonal Shift | Temporarily changes playing Tone notes from a pitch-shift keypad. |
| Macros | Changes assigned MIDI CC parameters across tracks. |
Play an effect
In Song, open the performance controls with the hand/eye button. Choose Roll, Repeat or Hold, then touch the performance pad to engage it. Move while holding to shape the effect; release to end it. The quantized timing determines when the change takes effect.
Shape Roll, Repeat, Hold and Tonal Shift
For Roll and Repeat, drag horizontally to change the rate. Use Repeat over a playing phrase to catch and cycle its notes; use Hold over sounding notes to sustain them. Releasing returns you to the underlying playback unless PFM Latch is enabled.
Use the Tonal Shift keypad to change the pitch of playing Tone notes. It works especially well alongside other grid-based FX, such as Roll and Repeat.
Performance pad and macros
On the combined pad, X changes the Roll/Repeat rate and Y controls a chosen macro. Hold Shift to select Y macro 1–4.
Use and assign macros
Choose Macros to show four global macro pads. Drag a pad vertically to change its mapped parameters; release to end the temporary change.
To edit assignments, hold Macros and choose macro 1–4. Use the sequencer trigs to select a track, then adjust that track's mapped CC controls to assign them. Tap the selected macro number to return. A track needs a mapped CC profile for its parameters to be available.
Release or latch an effect
Normally, lifting your finger ends the effect. Turn on PFM Latch with the lock control to keep it active after release. Press the active effect again or use Kill to end it. Kill also resets the global macro values.
During Song step changes
Performance FX act on Prism's current playback, not on the saved Song steps. Step Kills can end active effects when the next Song step loads; leave it off to let a latched effect continue until you release it.
AUv3 hosts
Use one Prism instance per project to sequence multiple instruments through your AUv3 host.
Set up in AUM
- Add Prism to an AUM MIDI channel.
- Add your instruments on Audio channels and connect their audio outputs.
- Open MIDI Routing and route Prism to each instrument. Set each instrument to receive only its Prism track's MIDI channel (Track 1 = Channel 1), filtering out the others.
- Start AUM's transport, then press Play in Prism.
Tempo and transport: AUM sets the tempo. Prism has its own Play/Stop controls, but can play only while the host transport is running. Save the AUM session and the Prism project to keep your setup. Other AUv3 hosts use their own routing and transport controls. See the AUM Users Guide.
Standalone MIDI routing
Use Prism's MIDI matrix to connect a track to an instrument. MIDI routing does not carry audio.
Connect an instrument
- Open or connect the instrument and enable its MIDI input and audio output.
- Tap Prism's MIDI routing icon at the top right.
- Find the instrument across the top. Expand Prism on the right for numbered outgoing track-channel rows.
- Tap the intersection for the intended channel and instrument. Tap the same connection to remove it.
For example, Track 1 → Channel 1 requires the instrument to receive Channel 1. Do not also connect the all-track Prism row to that same instrument; it can double the notes.
Channels, ports and multiple instances
Each numbered Prism output row routes one MIDI channel. Drum pad output-note mapping is separate. Output Ports: 1 Port / 16 Ports changes endpoint availability at the next launch; it does not create connections. In a host, route multiple Prism instances separately. Incoming note-input channels do not change their outgoing track channels.
External keyboards and MIDI control
Connect a MIDI keyboard or controller to play and record notes, or select Scenes and Mute Profiles from hardware.
Play Prism from a keyboard
- Route the keyboard's MIDI output to Prism's input in the standalone matrix or AUv3 host.
- Open Menu → MIDI → External Note Input, enable it and select the keyboard's MIDI channel.
- Play or record notes on the selected Prism track.
Note input options
| Setting | Effect |
|---|---|
| Map White Keys: Off | Notes snap to the Song scale. |
| Map White Keys: On | White keys follow the selected key and scale. |
| Use Controller Velocity | Use incoming velocity rather than Prism's input velocity. |
| Grid Controller Drum Mapping | Reverse the incoming note-to-Drum-pad order to suit differently oriented grids. |
Select Scenes and Mute Profiles externally
In the external Scene/Mute settings, choose PC or CC and set Scene/Mute Channel to the controller's channel.
| Message | Scene | Mute Profile |
|---|---|---|
| Program Change (raw value) | 0–31 → Scenes 1–32 | 32–39 → Profiles 1–8 |
| Assigned CC (value) | 0–31 on the Scene CC | 0–7 on the Mute CC |
Some controllers display Program Change numbers one higher than their transmitted values. For CC, assign separate numbers to Scene and Mute Profile selection.
Track selection and value resend
Send Track Selection Signal sends a CC when you change tracks. Choose its channel (1–16) and CC# Offset (0–112); the CC number is the offset plus the track number minus one. Send Track CC on Double Tap resends that track's mapped values. Send MIDI Values for All Tracks resends values across the project.
Ableton Live
Prism sequences Ableton Live's instruments and lets you control their mixer, Rack macros and Simpler parameters from the Prism interface. Link a Live track, then work with its sound and automation directly in Prism.
Install and connect
- Download the Prism + Ableton installer from Prism Resources. It installs PrismScript and the Max for Live device in Live's User Library.
- Connect Prism to the computer. For wired MIDI on Mac, enable your iPad/iPhone in Audio MIDI Setup.
- In Live's MIDI settings, choose PrismScript as the Control Surface and assign its input and output ports.
- Route MIDI both ways, then enable Menu → Controllers → Ableton Controller in Prism.
Once enabled on both sides, Prism and Live connect automatically.
Link a Live track
- Open Track Setup → Ableton Track on the Prism track you want to link.
- Choose an existing Live MIDI track, or tap + to create one.
The track picker uses Live's names and colors. A Live track can belong to one Prism track at a time; selecting an occupied one transfers its connection.
Mix tracks and Drum Rack pads
Use Track Select for quick Volume (vertical drag on the Prism graphic) and Pan (horizontal drag). To see the mapped mixer controls, hold CC to open the profile picker. Here you can adjust Volume, Pan, Send A and Send B. Sends control the corresponding return sends in Live. With a Drum Rack, select a pad to control its sound. The pad's chain Volume/Pan balances that pad within the Rack. Simpler's own Volume/Pan controls shape the sample inside it.
Rack macros and parameter takeover
Prism shows the names and values of your Live Rack macros. Adjust them from Prism or Live; both stay in sync. A Rack supports up to 16 macros (eight visible in the compact 64-trig Macro tab). Eligible controls also support P-Locks, automation and LFOs.
Max for Live: precise control
With Live Suite / Max for Live, the installed Prism device provides a real-time path for sample-accurate P-Locks and LFO changes. Prism takes control of the mapped macros and parameters on that Live track. Tap the large Prism button on its Max for Live device to release takeover and edit the parameters directly in Ableton. Tap it again to let Prism resume control and update to the fresh Live values. Without Max for Live, the two-way mapping still works. Rapid P-Locks and LFO changes may have a little more timing delay.
Shape a sound with Simpler
A Live track with one Simpler opens as a Tone track in Prism. For a Drum Rack, select a pad containing a Simpler to open that pad's sample controls.
The waveform is your starting point. Start and End handles are available directly on it; drag them to choose the sample region. Then use the Simpler pages to shape the sound:
| Area | What you control |
|---|---|
| Waveform / Sample | Sample start/end, playback region, loop, volume and pitch. |
| Filter | Cutoff, resonance and the filter envelope to shape tone over time. |
| Amp Envelope | Attack, decay, sustain and release to shape how the sound starts and ends. |
Classic and One-Shot adjust which playback controls appear. Slicing is not currently supported in Prism.
P-Locks and modulation on Simpler
Select a stored trig in Trig Focus, then edit an eligible Simpler parameter to give that step its own value. Green marks a stored P-Lock; double-tap the locked parameter to remove it. For several trigs, use the rapid P-Lock parameter row from held Seq Setup where available. The same eligible controls can receive CC automation and LFO modulation.
Edit and Warp the sample
Tap the Simpler waveform to open the Sample Editor for detailed sample editing and Warp. The Start/End handles are already usable on the main waveform; the editor adds stretch and timing controls.
Warp changes the sample's timing in Live. Turn it on with Warp power, use ÷2 / ×2 to halve or double its beat length, or use the suggested beat fit control. Drag the editor waveform to stretch to a beat count. Tap the duration readout to choose the Warp mode and its settings; tap choice fields or drag numeric fields vertically.
Warp modes
| Mode | Additional controls |
|---|---|
| Beats | Preserve, Loop, Envelope. |
| Tones | Grain. |
| Texture | Grain, Flux. |
| Re-Pitch / Complex | No additional fields in the popup. |
| Pro (Complex Pro) | Formants, Envelope. |
Beats Preserve offers 1 Bar, 1/2, 1/4, 1/8, 1/16, 1/32 and Transients; Loop offers Off, Forward, Alternate. This is audio Warp in Simpler, separate from Prism's MIDI-note Warp effect.
Browse and replace samples
Hold the Simpler waveform for the sample browser. This loads a replacement into the same Simpler or Drum Rack pad.
- Open a folder to find samples.
- Use Preview to hear a sample without loading it.
- Tap the sample row to load it. The browser stays in place for trying more.
Use Random / REROLL for fresh choices and REVERT to restore the starting sample and supported settings. Back moves up a folder; MORE loads additional results.
Browser navigation and preview
On first opening, the browser tries the loaded sample's folder. During the current session it remembers the last folder and list position for each track/pad. Sources include Samples, Drums, User Library, Packs and Current Project. Hold the header's Back control to return to the main browser. Audition normally uses Live's preview. Some directly accessed files instead play through the Mac's system audio output. Sample replacement depends on the installed Live/connector version.
Ableton Hub
Use the Hub to manage the Live connection and Set, rather than the currently selected sample.
| Hub tab | Use |
|---|---|
| Home | View the connection; Resync refreshes names, values and waveforms. |
| Browser | Load instruments and sounds onto its selected Live track. |
| Save Info | Save both projects together or save Live alone. |
Save Prism and Live together
In Hub → Save Info, enable Sync Save to save the Prism project when you save Live. Save Ableton saves just the Live Set. Name each project on its first save.
Ableton Link and Link Audio
Link keeps Prism and Live synchronized over the local network; it does not send audio. With Live 12.4+, Link Audio can also stream Live's sound to standalone Prism, so you can listen from your iPad away from the computer.
- Connect your Mac and iPad to the same Wi-Fi network. Enable Link in Live and Ableton Link in Prism to share timing.
- In Live's Link menu or Settings, enable Link Audio. In standalone Prism's Ableton Link settings, enable Link Audio and allow local-network access.
- Open Prism's Audio → Receive channel and select Live's published Main or other output.
- Play Live and listen through the iPad's speakers or headphones. Try Auto latency if playback stutters or arrives late.
To control Live's transport and parameters remotely, keep the separate two-way PrismScript MIDI connection active over network MIDI instead of a USB cable. On Mac, create an enabled Network MIDI session in Audio MIDI Setup, then assign those network ports in Live and route Prism's MIDI in both directions. Bluetooth: Link/Link Audio does not connect over Bluetooth. You can use Bluetooth headphones as the iPad's audio output after receiving Live audio over Wi-Fi, though they add listening latency. The Link Audio receiver described here is part of standalone Prism.
Network and latency
Link and Link Audio need devices on a local network that permits peer discovery. For a stable connection, use strong Wi-Fi or wired Ethernet. In Prism, choose Auto latency or set a manual receive delay from 20–400 ms. Link synchronization, two-way MIDI control and Link Audio are separate connections; enable only what you need. Apple: Network MIDI setup · Ableton: Link Audio FAQ
Launchpad
Use Launchpad’s pads to play notes and drums, edit sequences and control playback in Prism. Choose Mirror to follow the current editor, Project Mixer for tracks and saved objects, or Seq 64 for a full grid of steps.
Connect Launchpad
- Connect Launchpad. In Menu → Controllers, turn on Dedicated Controller MIDI Port.
- Route Launchpad MIDI Out → Prism and H.Controllers → Launchpad MIDI In. Allow SysEx on the feedback return.
- Enable Launchpad last: open Menu → Controllers → Connect Launchpad and choose its generation and model. Prism sends a setup signal to prepare Launchpad, so both routes must already be connected.
- Route Prism’s instrument output separately. Press a pad to check that Prism responds and the pad lights update.
SysEx must reach Launchpad for setup and light feedback.
| Controller port | Feedback return | Filter |
|---|---|---|
| Dedicated port on | H.Controllers → Launchpad MIDI In | Allow SysEx. |
| Dedicated port off | Prism → Launchpad MIDI In | SysEx only: block notes and CCs so instrument traffic does not affect the pads. |
Supported: MK1 Pro; MK3 Mini, X and Pro. Mac MIDI Connector notes.
Mirror
- Top controls
Start/stop, record, capture, copy or paste.
- Views & keypads
Choose Song, FX, MIDI or Seq, then a keypad.
- Keypad
Play or edit using Prism’s current keypad.
- Value row
Set input velocity, or the focused trig’s velocity.
- Steps & pages
Tap steps to edit; hold for Trig Focus. Pg buttons change pages.
- Setup & navigation
Open Seq Setup or Track Select. Use arrows for pages.
| Gesture | Action |
|---|---|
| Hold Seq Setup | Open setup temporarily; release to return. |
| Copy / Paste / Loop + page | Copy, paste or loop that page. |
| Mute/Shift | Tap to toggle Shift; hold for a temporary Shift. |
Value row ④ in other views
| Prism view | F1–F8, left to right |
|---|---|
| Track Select | Track velocity offsets; press the same offset again to reset. |
| Scene keypad | Select one of the eight displayed Mute Profiles. |
| Advanced Arp | F1/F2: shape; F3/F4: rate. |
| Chord Block edit | F1/F2: pitch; F3: remix; F4: restore. |
| Seq Setup | F1: duplicate ×2; F3: stretch ×2; F8: Drum sequence link. |
In Seq Setup, the final page pad toggles quick navigation: four page blocks, then 1/16, 1/8, 1/4 and Fit.
Project Mixer
Tap Mixer ① to enter. Tap again to return to Mirror.
- Mixer
Switch this companion layout on or off.
- Tracks
Select a track.
- Patterns & Sounds
Choose the track’s Pattern or Sound.
- Mute Profiles & Scenes
Recall a Mute Profile or Scene.
- Play & select
Drums: select and play pads. Tone: A–D select sequencers; the other pads play notes.
- Chord Blocks
Play Blocks 1–8 on a Tone track.
| Gesture | Action |
|---|---|
| Hold an object pad | During playback, recall temporarily; release to return. |
| Mute/Shift + track | Toggle the track’s mute. |
| Copy / Paste + track | Copy or paste the track. |
| Mute/Shift + Block | Clear the Chord Block. |
Objects follow Prism’s current bank and display order. A–D selection uses Multi Seq.
Seq 64
Tap Seq 64 ① to enter. Tap again with Shift off to return to Mirror.
- Seq 64
Switch this companion layout on or off.
- Steps
Tap to edit; hold a step for Trig Focus.
- Length
Hold + press a step to set the sequence end.
- Velocity
Set input velocity, or the focused trig’s velocity.
- Mixer shortcut
Tap to visit Mixer; tap again to return. Hold for a temporary visit.
| Gesture | Action |
|---|---|
| Shift + Seq 64 | Toggle 32 steps + a keyboard; sixteen playable pads on drums. |
| Capture + step | Extend to that step, copying the sequence-filter range. |
| In Trig Focus: ③ or ⑤ | Toggle Focus Lock; keep the step selected after release. |
Enter Mixer through ⑤ for track velocity offsets instead of Chord Blocks. Leave Trig Focus before switching modes.
How the top buttons change
| When | Top buttons, left to right |
|---|---|
| Hold Length ③ | Page blocks 1–4 · 1/16 · 1/8 · 1/4 · Fit. |
| Hold or lock a step ② | Note up/down · shift earlier/later · conditional positions 1–4. |
Conditional: tap to toggle; hold for cycle length. Release an unlocked step to leave focus.
Launchkey Mini MK4
Use Launchkey Mini MK4’s keys to play and record notes, its pads to edit steps, and its encoders to adjust parameters. The controls follow the selected track and editor.
Arp, Scale and Settings cannot be repurposed and are ignored by Prism’s controller map.
Connect Launchkey
- Menu → MIDI → Note Input → External Note Input: turn it on.
Set All Channels to Off, then select the channel Launchkey transmits on.
- Menu → Controllers → Launchkey Mini MK4: turn it on.
On the same page, turn Dedicated Controller MIDI Port on.
- Connect the MIDI routes:Launchkey DAW Out + MIDI OutPrismPrism H.ControllersLaunchkey DAW In
Route Prism's instrument output to your instrument separately.
- Check the connection: press Play to check Prism's transport responds. Play a key to check the selected instrument receives notes; pad lights should follow Prism.
Shared feedback port
With the dedicated port disabled, route Prism to DAW In and filter out channels 1–3.
Connect through a Mac
Use the separate MIDI Connector utility to connect a Launchpad or Launchkey to Prism on iPad through a Mac. Follow the Prism download and setup instructions, then connect both controller input and feedback return.
Main controls
Select a track and sequencer
Select a track
Tap Function → press a track pad
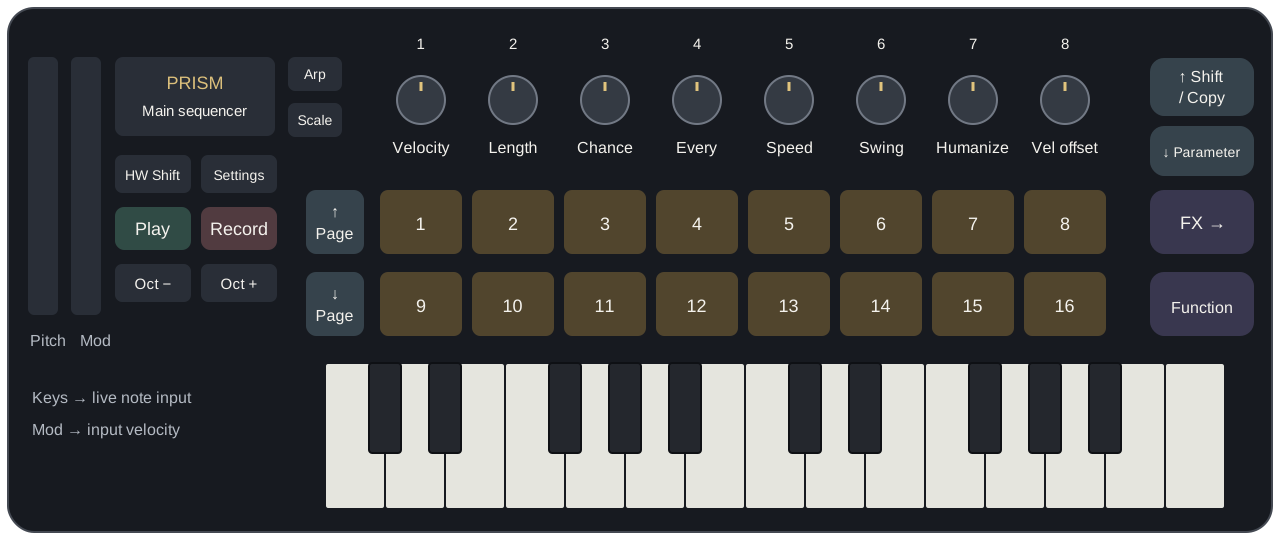
| Pads | Select the track to work on. |
|---|---|
| Encoders | Velocity offsets for Tracks 1–8 or 9–16, following the selected track. With Ableton, mapped Live volume. |
| ↑ / ↓ | Mute / Solo. |
Select its sequencer
Double-tap Function → press a sequencer pad
Choose a Tone sequencer A–D or a Drum sequencer. Pads and encoders follow Prism's sequencer-selection view.
Direct sequencer pads
Double-tap FX → select a Tone sequencer or select and play a drum
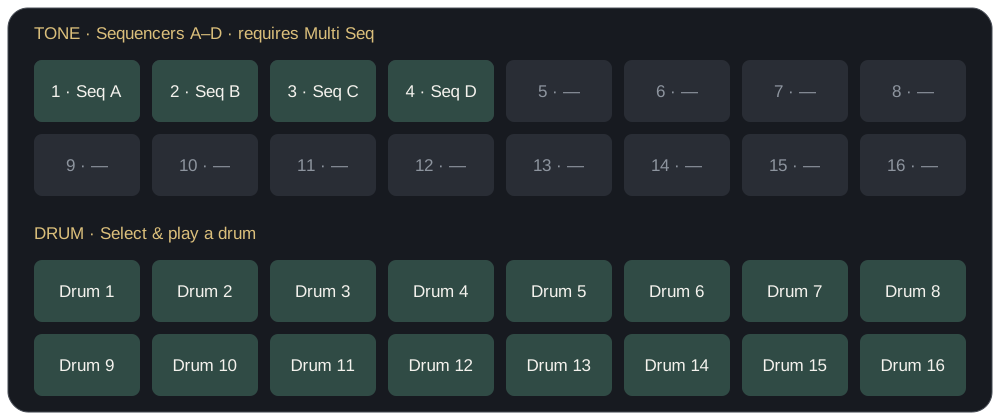
Shift/Copy + pad toggles mute. Encoders 1–4 adjust Tone sequencer velocity offsets; drums follow the selected bank of eight, or mapped volume with Ableton. Tap FX to return to the sequencer.
Project objects
Hold ↑ in the main sequencer → choose a category → choose an object
Banks follow the selected category. With Patterns selected, press Function while holding ↑ to paste into a new Pattern.
Quick setup
Hold ↓ in the main sequencer
A–D requires Multi Seq. Press Function while holding ↓ to double and duplicate.
Edit the sequence
Steps and pages
Tap FX to return to the sequencer
Pads: steps 1–8 on top, 9–16 below. Tap ↑ / ↓ to change page. Mod sets input velocity.
Trig Focus
Hold a step pad → edit that trig
Function toggles Focus Lock. ↑ / ↓ transposes Tone notes or shifts Drum trigs. Use FX to leave focus and return to the sequencer; if a mapped subview is open, FX closes that first.
FX
FX selector
Tap FX in the sequencer · tap FX again to return
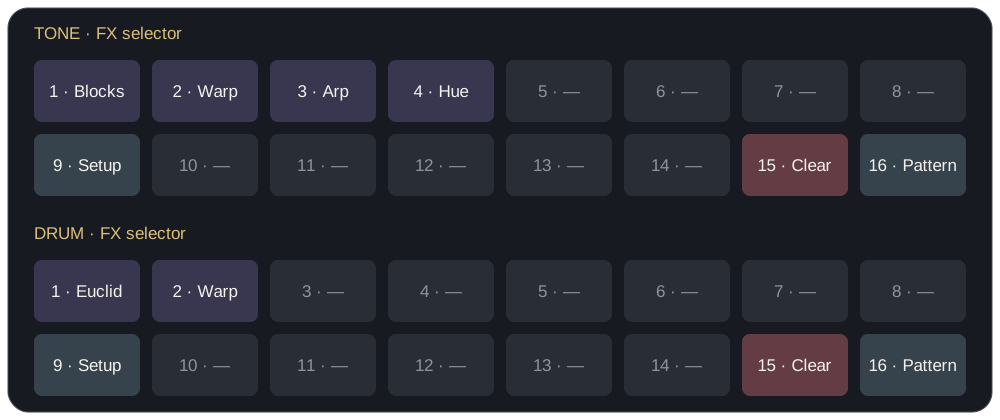
Choose an FX pad, then turn its encoders. Hold FX to open the selector from another editor. Pad 15 clears the active sequence.
Chord Blocks
Tap FX → tap pad 1 · Tone tracks
Top row plays Blocks 1–8. Below each block: double-tap to clear a filled block; press to generate/remix an empty one.
Sequencer Setup
Tap FX → tap pad 9
Ordinary sequencer Setup. ↑ applies Legato; ↓ doubles and duplicates.
Mapped parameters
Hold Parameter → turn a displayed parameter's encoder
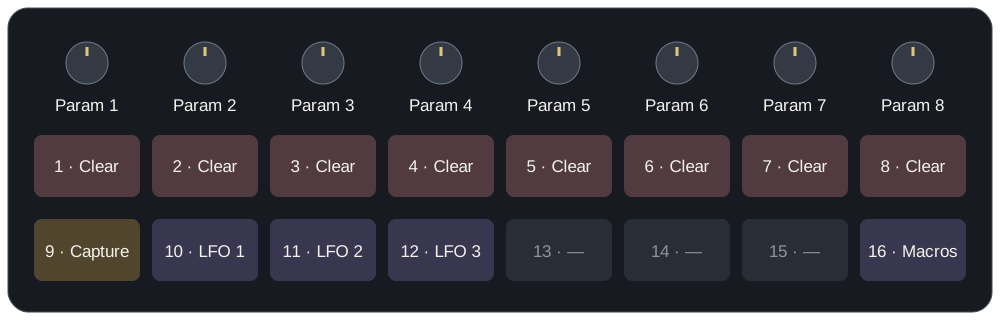
↑ / ↓ changes parameter page. Pads 1–8 clear automation, or remove the target when an LFO is armed.
| Double-tap Parameter | Choose a group. Selecting while held closes group selection on release. |
|---|---|
| Tap pad 16 | Macros: encoders 1–4 adjust A–D; pad 16 returns. |
Parameter locks and LFO editing
| Focused mapped subview | Parameter toggles the lock-pad layer. Pads 1–8 clear displayed P-Locks. |
|---|---|
| Separate LFO editor | Pads 9–11 select LFOs 1–3. Encoders: Shape, Rate, Mode, Depth, Curve, Phase. |
Mapped-parameter editing uses pads 10–12 for those LFOs.
Record and Capture
Record automation
Hold Record + turn a mapped encoder
Enable automation recording. Release Record to finish.
During playback, tap Record to toggle recording; hold for momentary recording.
Capture automation
During playback: hold pad 9 + turn a mapped encoder
Use mapped-parameter editing. Release Capture to finish.
Shift/Copy can replace pad 9.
More Capture gestures
| Shift/Copy + Record | Quick Capture. |
|---|---|
| Double-tap Shift/Copy while automation recording is active | Clear the active automation-editor lane. |
A new captured parameter gesture finishes the previous one.
Additional controller shortcuts
| FX held or selector open | ↑ opens Pattern; ↓ opens Sequencer Setup. |
|---|---|
| Block-randomization mode | Lower Chord Block pads remix their blocks. |
| Sequencer Setup | Encoders 1, 2 and 4 edit bars, extra steps and step count. |
| Mapped groups | Press the active group to toggle its parameter-name display. |
Files and saving
Save Prism projects, reuse object presets and keep backups of external MIDI and user profiles.
Save a project
Project saving preserves Prism’s musical setup. It does not automatically save the receiving instrument or host session. Open Menu → Projects → Save Project, enter a session name and choose a folder. Standalone also provides a folder-menu shortcut.
Whole-session saving · standalone quick folder menu or Menu → Projects
Projects save the session’s musical state; global device settings remain separate. A project save does not guarantee that external Staging MIDI files are embedded. Save the receiving instrument/host session too if it has its own sound or routing state.
Project save options
- Open the folder menu and choose Save, or open Menu → Projects → Save Project.
- For an untitled project, enter a session name and select a folder. Use New Folder if you need a new destination.
- Press SAVE SESSION. After a successful save, that named project is your current save destination.
- Use Save again to update it. Use Save As to create a separately identified project before making a variation.
Folders and project identity
Choose the default root or a named folder in the save form. New Folder creates and selects the folder; an empty folder name does nothing. An empty session name becomes Untitled with date/time.
Save preserves the loaded project’s identity. Save As gives the new file a separate identity. A save request is not proof of success; if the form remains open or an error appears, check the destination and retry before opening another project.
Open and manage saved projects
The project browser opens named Prism sessions and lets you manage the saved file collection.
- Open Menu → Projects → Open Project.
- Choose / [ Default ] for root-level projects or choose a named folder.
- In the project list, identify the file by name and last-modified date/time. Use the sort control for alphabetical order or most recently modified first.
- Tap the project row to load it. Successful loading closes the menu, updates Recent Projects and makes it the current Save destination.
Project browser
The header names the current folder; Back returns to folder selection. Reopening remembers the last folder/list view. This browser loads directly from a row; it does not use the quick menu’s Recent confirmation. Save edits you need before loading a different project.
Recent tiles and deleting a file
In the quick folder popup, tap a Recent tile once to show Load?, then tap the same tile again within three seconds to load. Tapping a different tile changes the pending choice. Confirmation does not automatically save current work.
In the full Open Project browser, tap a row’s trash icon to reveal Delete and X. Press Delete to remove the file, or X to cancel. Confirmation expires after about three seconds; tapping the row during confirmation does not load it. Deleting also removes the Recent entry. Keep a separate backup if you need a way to recover a deleted saved file.
Start a new project
Save your work before choosing New Project; Prism asks you to confirm before discarding the current project.
In the quick folder menu, press New Project, then Discard changes? within three seconds. The drawer route Menu → Projects → New Project also confirms twice, with a two-second window.
New Project confirmation
These confirmations appear even if the project has no unsaved edits; they do not save first. A new project clears the current project and its Ableton pairing intent. It does not delete saved project files or presets.
Recover an earlier snapshot
Recover Autosave restores an earlier saved snapshot; this may replace several recent edits at once. Open Menu → Projects → Recover Autosave to recall an earlier autosaved snapshot.
If it contains the work you need, save it under a deliberate project name or use Save As to keep the current saved version separate.
Autosave recovery
Menu → Preferences → Autosave Interval chooses 3, 5, 7, 10, 15, 20, 30 or 60 seconds and also controls undo-history spacing. Recovery operates on snapshots, so it is not a guarantee of one undo item per gesture. A snapshot predating an edit cannot recover that later edit. External Staging sources must still be available.
Reuse objects as presets
Object presets reuse a specific editor’s configuration, unlike a full project containing the broader song state.
Eligible object editor · dropdown arrow beside the top name/notification area
An object preset saves that kind of object, not the whole session. Project Save/Save As uses the folder/menu flow above.
Preset management
- Open the dropdown and check the category: for example Arp, Harmonizer, Hue, LFO, Sound, Track, Staging Palette or Chord Block.
- Tap + to open Name Preset and create a named object preset.
- For an object already identified with a saved preset, the save icon below + writes its current state back to that preset.
- Tap a preset name to load it. If its row edit controls are open, the first name tap closes those controls; tap the name again to load.
Rename, assign colors, filter and delete
Tap a preset row’s color icon to reveal its edit controls. Submit the Rename field to commit a new name. Choose a color swatch to assign it; selecting its assigned color again removes the assignment. Hold the trash control to delete the preset.
The separate column of eight color swatches filters the preset list. Tap the selected filter again to show all colors. Assigning a row color and filtering the list are separate actions.
Drum and CC profiles
Drum and CC/MIDI profiles are mapping resources: Drum profiles define pads and output-note identities; CC profiles define mapped controls for a receiving device. They use their own profile-library/editor access rather than the object dropdown’s generic save icon.
Load the required profile from the corresponding Drum or CC profile library before using its mapping. Automatically Rename Track can let a loaded profile rename a still-default track; a custom track name is retained. For backups, use the dedicated profile import/export access described below. A profile file does not contain exported sequence-note MIDI.
Back up and move your work
Projects, user profiles and external MIDI source folders can be different files; back up each source you rely on.
Back up the named Prism project and any related user profiles or MIDI source folders. These are separate resources: saving a project does not guarantee its external Staging MIDI files travel with it.
Backup locations
Drum-profile collection
- Open Menu → Projects → User Data → Import / Export Drum Profiles.
- Choose Export All and select the destination in the system folder picker. This copies the saved user collection, not only the active track’s profile; originals remain in Prism.
- To restore/add profiles, choose Import and select one or several profile files in the system file picker.
- Load an imported profile from the Drum profile library when you need it.
For CC/MIDI mappings, open the CC profile library. The profile backup page offers Export All and Import for mapping resources, rather than note sequences. Keep these resources with your project backup if your receiving setup depends on custom mappings. Import adds saved profiles for later selection; Keep the original backup when importing profiles.
Staging portability and export types
A Staging project saves bank settings, staging sequences and shared latch state, together with references to its source folders/files. Those external phrase files must remain available after reopening or moving the project. Keep the source MIDI folder hierarchy when copying your work; if slots are unavailable, reselect the source folder or reload their phrases in Staging.
Projects, object presets, Drum/CC mapping profiles, external MIDI phrases and host sessions are different resources. Preserve each resource your setup uses. The system file/folder pickers provide external file access; the Open Project browser described here does not establish a built-in project rename/move/share command.
MIDI import accepts note files. Profile export exports mapping definitions. Drum/CC profile export saves mappings, not sequence-note MIDI files. For audio recording, record the receiving instrument or host’s output.
Projects and host sessions
A Prism project and a containing AUv3 host session save different information. Both may be needed to reproduce a setup.
A named Prism project saves Prism’s musical state. An AUv3 host session saves the host’s instrument instances and routing; standalone and global preferences have different ownership.
Save the relevant document in each place when you need to restore the complete setup.
Host save scope
Save your AUv3 host session to preserve the Prism instance and the host’s instruments/routing. Reopening restores that instance through the host. This is separate from Prism project Save/Open, which gives you a named musical project inside Prism.
A project contains the musical session state; global device settings remain separate. Direct standalone project loading can restore saved standalone MIDI routing. Host restoration keeps the current standalone routes instead of replacing them with the archived ones. Older projects with no standalone route data retain current routes. Endpoint names being saved does not ensure disconnected hardware is available when reopened.
For save timing preferences, see Settings. For missing files or recovery problems, see Troubleshooting.
Settings
Open Menu → Preferences for appearance, gestures, MIDI and editing defaults.
Appearance and layout
Appearance settings change how the interface is displayed, not the notes stored in the project. Tap the Prism-shaped menu icon at the top left, beside the notification strip, then choose Preferences.
Change one visual option and return to the editor to see its effect. These controls affect the interface rather than removing musical events.
Appearance options
| Setting | Choices / effect |
|---|---|
| Theme | Light / Dark |
| Color Palette | Bright / Dusty / Mono; Mono reveals separate color choices |
| Monochrome Colors | Choose the mono scheme’s colors when Mono is selected |
| Show Notes & Patterns on Pads | Show/hide pad overlays |
| Show Slider Value Popups | Show/hide value feedback while editing |
| Highlight Touches | Show touches for visual feedback |
| Highlight Incoming Notes | Show received-note feedback on the keypad |
| Show Keypad Note Labels | Show pitch names on note pads |
| Monochrome Arpeggiator | Neutral instead of pitch-colored Arp display |
| Keypad Tab Order | Drag the four actions into your preferred order; left is bottom, right is top beside the keypad |
Changing palette applies its color scheme.
Visible steps and portrait placement
Visible Sequencer Steps chooses 16 / 32 / 64 where the layout offers them. It changes display capacity, not the stored sequence length. Phone layouts offer 16/32; 64 belongs to larger supported layouts. Native Launchpad setup constrains its normal display to sixteen; the controller’s separate 64-trig layer has its own mapping.
Swap Keypad & Sequencer Position and Swap Control Bar Position apply in portrait orientation. AUv3 views also respond to the host window size, including a narrow trig-only layout where appropriate. If a control is absent, check the active layout/context before changing sequence content.
Touch and editing gestures
Gesture preferences alter input behavior, so they can change how a tap, hold or drag is interpreted.
Open Menu → Preferences → Gestures to adjust tap, drag and long-press behavior. These preferences affect how controls respond; they do not rewrite stored note data.
Gesture options
| Setting | Choices / effect |
|---|---|
| Keypad Touch Velocity | Vertical touch position on keypads sets input velocity on all tracks |
| Drag Sensitivity | 0.1–2.0 control-movement sensitivity |
| Lock X/Y Movement to First Axis | Only the first movement direction responds until you lift your finger |
| Share View State Across Tracks | Keep the same editor view when switching tracks | | Sequencer Step Drag → Drum Tracks | Length / Position | | Sequencer Step Drag → Tone Tracks | Length / Position, independently of Drums |
Gesture details
Touch velocity differs from Use Controller Velocity, which applies to incoming MIDI. Sharing view state keeps navigation context; it does not share the tracks’ notes or musical settings. If step dragging does a different edit than expected, inspect the appropriate Tone/Drum choice here.
Arpeggiator step gestures
Arpeggiator Step Gestures controls the meaning of three gestures:
| Gesture | Options |
|---|---|
| Double Tap | Mute Step / Reset Step |
| Long Press | Set Length / Edit Step |
| Shift + Tap | Mute Step / Set Length |
Reset Step resets that step, rather than clearing the whole pattern. Check these preferences before following a gesture-based Arp task if your setup behaves differently.
Defaults for new work and recovery
Editing defaults affect newly created material and recovery spacing; they need not rewrite existing sequences.
Auto-adjust Step Resolution adapts the display as sequence length changes to help keep a one-page sequence on one page. It does not delete hidden/off-grid pulses or quantize their timing.
New-work defaults
New Drum Pads: Linked / Independent sets the initial state of newly created pads. Linked pads share settings; Independent pads begin with their own. Changing this preference does not relink pads already in the project.
Autosave Interval: 3 / 5 / 7 / 10 / 15 / 20 / 30 / 60 seconds also controls undo-history spacing. Shorter spacing yields more frequent snapshots; it still does not guarantee a separate snapshot for every gesture. Recover Autosave is in Menu → Projects.
Automatically Rename Track, in MIDI output/profile preferences, lets a loaded profile rename a track still using its default name. Custom names are retained.
Playback and Song
Playback & Song settings govern when arrangement changes load and how transitions behave.
Use Menu → Playback & Song to choose timing and recall behavior for Scenes, Patterns and Song steps. These options determine when a change takes effect and what it recalls.
Song behavior options
Open Menu → Playback & Song.
| Setting | Effect |
|---|---|
| Quantize Scene Changes | Switch Scenes at the next bar boundary |
| Quantize Pattern Changes | Independently switch Patterns at the next bar boundary |
| Restart Pattern on Scene Change | Control restarting Pattern playback on an unquantized Scene change; see Scene quantization for how a quantized change is scheduled |
| Link Patterns & Sound Profiles | Pair each Pattern with its matching Sound Profile |
| New Step Behavior: Linked | New Song steps reference a Scene |
| New Step Behavior: Unlinked | New Song steps capture the current state |
Quantization chooses when a switch happens; Restart Pattern on Scene Change applies when Scene quantization is off. A Song step’s Cont./Reset choice controls Pattern positions when that step loads. Pattern/Sound linkage does not change MIDI mirror routing. New Step Behavior affects future captures; existing Song steps retain their own linked/snapshot identity.
MIDI and controllers
MIDI settings control note input, outputs and controller behavior. Match the route to the device’s actual ports.
Open Menu → MIDI / Controllers for note input, mapping and controller setup. Choose the input and output settings that match the instrument or hardware controller you are using.
Standalone MIDI routes and Link Audio reception live outside these general preferences.
MIDI and controllers
| Menu / setting | Use | Detailed task |
|---|---|---|
| MIDI → Note Input: External Note Input and Channel | Receive notes on 1–16 or All Channels | External keyboard |
| MIDI → Note Input: Map White Keys | Map white keys into the selected key/scale, or snap input pitches when off | Incoming-note behavior |
| MIDI → Note Input: Use Controller Velocity | Use received velocity instead of set input velocity | External keyboard |
| MIDI → Note Input: Grid Controller Drum Mapping | Align grid input to Drum pads | External keyboard |
| External Scene/Mute: PC / CC, channel, CC numbers | Select Scenes/mute profiles from a controller | Raw values and channels |
| MIDI Output: Output Ports | 1 Port / 16 Ports; next launch | Output routing |
| MIDI Output: Track Selection Signal, channel and CC offset | Send selection CCs on active-track changes | Selection messages |
| MIDI Output: Track CC on Double Tap / Send All Values | Resend current mapped values | Resending |
| Controllers: Ableton Controller | Enable Live integration | Ableton setup |
| Controllers: Connect Launchpad, generation/model | Enable the selected Launchpad | Launchpad setup |
| Controllers: Launchkey Mini MK4 | Enable its contextual mapping | Launchkey setup |
| Controllers: Dedicated Controller MIDI Port | Separate feedback/control traffic onto H.Controllers | Controller routing |
Standalone routing and Ableton Link/Link Audio are host-level controls outside these global drawer preferences. Select Ableton Link → Audio for receive-channel/latency controls in standalone.
Settings ownership
Global preferences, project contents and host session information have different owners and saving scopes.
Prism’s global preferences are separate from named projects and host sessions. Save the musical project or host session for those states; the Preferences menu holds device-wide choices.
Project and device storage
Global device preferences remain separate from named Prism projects. Saving or opening a project does not serve as a preference backup or reset. Musical choices such as track channels, patterns and mapped values belong to the relevant project/editor context. Host routing belongs to the host; standalone project routes have the restore rules described under Projects and host sessions.
An existing installation can retain different values from a fresh installation. The menu shows your current values; use them as the starting point. Features in this manual are available as implemented; purchase/extension activation is outside the intended release’s workflow.
For connection tasks, see Connections and integrations. For saving and recovery, see Files and saving.
Troubleshooting
Find the symptom below and check its likely causes. Save a separate project copy before clearing or replacing material.
No sound, wrong instrument or doubled notes
If the playhead moves but you hear nothing, check filled trigs, MIDI routing, receiving channel and instrument audio output—in that order.
If notes double, look for two routes to the same receiver.
MIDI and audio checks
If the wrong instrument plays, inspect the destination and channel filter.
If notes double, look for both all-track and channel-sliced routes to the same receiver, or a host route sending the keyboard directly to the instrument as well as through Prism. See standalone routing and AUM setup.
Output and routing checks
- Confirm the correct track/pattern is selected and contains trigs. In AUv3, start the host’s transport and make sure the Prism node is active.
- Check the route from Prism’s MIDI output to the receiving instrument. A connected keyboard input alone does not provide an instrument output route.
- Match the receiver’s input-channel filter to the intended Prism track output. For Drums, also check each pad’s output note.
- Confirm the instrument has a sound loaded, its level is audible and its audio output reaches your hardware output/headphones.
- Check track/pad/lane mute, current Scene mute profile, Solo and conditional playback settings.
Mute, conditions and note-processing layers
Mutes, Chance/Every conditions, gates, Arp, routing and locks act at different layers. A stored trig does not guarantee a note reaches an instrument on every pass. Compare the active page/range, mute state and conditions before clearing anything.
For a note that keeps sounding, stop playback and inspect held/latching sources, Staging launches and the receiving instrument. Release the performance source and remove an unintended duplicate/feedback route. Hold Stop in Prism for Panic if notes remain stuck.
Incoming notes and controller feedback
Check both controller MIDI input and the separate LED-feedback return route.
| Symptom | Check |
|---|---|
| Keyboard does not affect Prism | Keyboard output → Prism input; External Note Input enabled; transmitting channel matches its filter |
| Notes arrive with unexpected pitches | Selected key/scale; Map White Keys mapping versus scale snapping |
| Note velocity ignores your playing strength | Use Controller Velocity; distinguish Prism Keypad Touch Velocity |
| Grid drum notes land on the wrong pads | Grid Controller Drum Mapping; selected Drum profile/pad mapping |
| Controller buttons work but LEDs do not | Feedback return route; Dedicated Controller port and correct hardware input port |
| Launchpad flickers with instrument notes | Separate H.Controllers feedback, or SysEx-only filtering on shared feedback |
| Launchkey keys work but pads/encoders do not | Both DAW Out and MIDI Out return to Prism; DAW In receives feedback; specific note-input channel selected |
| Controller button does an unexpected edit | Current normal/Mixer/64 layer, Trig Focus, lane or parameter context |
Choose the correct Launchpad generation/model and Programmer Mode; enable the intended controller in Menu → Controllers. Recheck the return route after unplugging/reconnecting. Consult Launchpad or Launchkey for exact routing.
Ableton integration
Ableton integration needs a working control-surface connection and a monitored receiving track.
For a missing Live connection, check PrismScript, both MIDI directions, the Ableton Controller switch, the Live track’s Monitor=In, then Hub → Resync.
For an unresponsive instrument or macro, inspect the Live track owner and mapping.
Live connection checks
- Confirm the complete current PrismScript package is installed and selected as a Live Control Surface.
- Check both MIDI directions and the selected Live surface input/output ports. Keep the host/device connection active.
- Confirm Ableton Controller is on in Prism and the target Live MIDI track has Monitor=In.
- Open Track Setup → Ableton Track. Check the intended tile’s owner, not only Live’s selection highlight. Wait for the request to finish.
- Use Hub → Resync to refresh labels, mapped values and sample waveform information.
If a send does nothing, verify the Live Set contains its return destination. If a macro does nothing, check its Live assignment. If a sample operation reports compatibility limits, follow that message rather than assuming the waveform means every edit is supported. An unsaved Live Set needs Live Save As before Prism’s Save Ableton command can save it.
Turn Menu → Controllers → Ableton Controller off to disable the overall integration. Hold Reset Track removes one track’s connection but also clears its sequence/setup; save first. The Mac MIDI Connector for controllers is independent of PrismScript and does not solve a missing Live control surface by itself.
Link Audio monitoring
Network audio requires a published Live channel and a matching Prism receive selection.
For Link Audio, confirm Live and Prism share a local network, Live publishes audio and Prism selects its Ableton Link → Audio → Receive channel.
If sound is delayed, try Auto latency before manual adjustment.
Link Audio checks
Standalone Link Audio
- Use Live 12.4+ and put Live/Prism on the same local network.
- Enable Link and Link Audio, allow requested local-network access, and publish Live’s output.
- In Prism’s Ableton Link → Audio, select the intended Receive channel. No channels published indicates no stream is available.
- Check the iPad’s active audio output/volume. A working MIDI connection or Link tempo display does not prove audio streaming is active.
- For delayed or unstable monitoring, try Auto latency; with it off, adjust the 20–400 ms delay. Network quality affects the return path, so compare with local instrument monitoring before changing musical timing.
Link Audio is separate from Link timing and MIDI control. The documented Prism receive route is standalone; hosted AUv3 uses the host’s own audio setup. See Link Audio monitoring.
Missing notes or unexpected edits
A note can be hidden by grid resolution, page selection, mute or loop settings without being deleted.
| Symptom | Check before changing notes |
|---|---|
| A trig is no longer visible | Selected page, visible steps, resolution and playback range; off-grid events can remain stored |
| Changing track leaves the same view open | Share View State Across Tracks |
| Dragging edits position instead of length | Independent Tone/Drum Step Drag preference |
| Arp double-tap mutes instead of resets | Arpeggiator Step Gestures preference |
| A parameter responds on only one axis | Lock X/Y Movement to First Axis; specific control’s contextual gesture |
| A Scene/Pattern change waits | Quantize Scene/Pattern Changes and the next bar boundary |
| Scene recall restarts unexpectedly | Restart Pattern on Scene Change (unquantized Scene changes), Scene quantization, and a Song step’s Cont./Reset choice |
| New Song step follows later Scene edits | New Step Behavior Linked versus captured Unlinked state |
| Staging pad selects without launching | Bank Keypad Playback Mute; it does not stop existing launches or sequence playback |
| Staging phrase starts later than the pad press | Launch quantization and active transport |
| Randomize leaves some Staging slots alone | Individual slot lock, Trig Lock, source scope and available files |
Hidden events and edits
Do not treat a display preference or hidden page as data loss. If an edit was unwanted, use available undo/recovery before making further edits, and save a separate copy once the desired state is recovered.
Capture and capacity messages
Capture messages identify missing data, unavailable destinations or capacity limits.
| Message or result | Next useful check |
|---|---|
| N/A: Patterns Full | Choose an available Pattern destination, or save the work you need before freeing one |
| N/A: Lanes Full | Use an existing eligible lane or deliberately free one after saving |
| Staging is busy; try again | Let the current operation finish, then retry |
| No staging slots available to randomize | Check locks, Trig Lock and the selected folder’s eligible phrase files |
| Capture does not commit | Confirm the captured source is nonempty/eligible and the destination has capacity |
Capture destination and import actions can replace existing content. Save a project copy before a deliberate overwrite. A failed or empty capture is not proof that a hidden undo snapshot exists. Read the notification, verify destination/context, then retry the intended operation.
Missing files, saving and recovery
Saving the Prism project and retaining its external MIDI or host resources are separate checks.
| Symptom | Recovery path |
|---|---|
| Project save form stays open / save fails | Check name/destination access and retry; confirm saved file before switching projects |
| Recent tile did not load | Repeat the same tile’s confirmation within three seconds, or use Open Project |
| Missing Staging phrases after project move | Restore source MIDI folders/files, reselect their folder or reload slot phrases |
| Profile backup did not export note sequences | Drum/CC profiles are mappings; sequence-note MIDI export is a different resource and no command is established here |
| Drum import erased pads with no new notes | Direct drum import clears all sixteen pad sequences; recover your earlier project/snapshot |
| Imported rhythm/pitch differs | Check leading whole-bar trim, destination scale/source key, Pad Type mapping and sixteen-bar length cap |
| Host project reopened differently | Check the host session versus named Prism project, endpoint availability and global device preferences |
| Unwanted edit needs an earlier state | Menu → Projects → Recover Autosave; save recovered work deliberately |
Recovery checks
Recover Autosave uses earlier snapshots spaced by Autosave Interval, which also spaces undo history. It cannot guarantee every gesture or restore deleted external files. Saved profile originals survive Export All; external backup and Staging files still need their own preservation. See Files and saving.
Find help and report a problem
Include the Prism build, device/host and steps to reproduce the issue.
Open Menu → Help & Support for Help Mode, the First Beat Walkthrough, the manual or support links. For a report, include the Prism build, platform/host, steps, expected and actual result, and the relevant routing or saved context.
Support channels
Open Menu → Help & Support. Help Mode enables control-specific help. First Beat Walkthrough opens the introductory task; Manual opens the linked manual. SFM and A Mortal Mage open tutorial playlists. Send Feedback, Roadmap & Feature Requests, Discord and Facebook open their respective destinations.
For a useful report, include the Prism version displayed in the menu, device/platform, standalone or AUv3 host name, the shortest steps, expected result and actual notification. For MIDI/controller problems, include the controller/model and input/output route; for Ableton, include Live version, PrismScript package and target Monitor setting. A screenshot of the affected context and a small saved project can help explain the issue. Send reports only through the chosen support destination; opening a menu item alone does not send one.
Return to Connections, Files and saving, or Settings for the complete task.